Tuesday, March 31, 2020

How To Make A Colonial Toilet Paper Holder Using Proxxon Tools


Hi friends! I stated in my last project that I'm making a few things for my tiny powder room. I designed a toilet paper holder that is similar to the frame on my mirror. Follow along with me and I'll show you how I made it.

Supplies:
 Proxxon Micro Band Saw
 Proxxon Drill Press
 Proxxon Delta Sander
 1/2" Birch Plywood
 Wood Dowel Rod
 Brad Nailer
 Wood Glue
 Plaid Paint  (black)
 Plaid Inspirations Wax  (clear)

1. First I figured out a pattern, keeping in mind the size of the roll of toilet paper. Transferred my pattern to my wood.


2. Cut out all the pieces with the Proxxon Micro Band Saw. Just want to mention that because the band saw throat is small, the pattern may have to be drawn on both sides of the wood. When in a tight spot while cutting, turning it over and cutting from the other side usually works.

3. Line up all the pieces to see how they fit then sand with the Proxxon Delta Sander.

4. Using the Proxxon Drill Press, drill holes for the roller on each side piece.

5. Using the band saw I cut a length of dowel rod for the roller. I notched each end to make it easy to grab then sanded.

6. I then glued and nailed the sides to the back.

7. I painted my holder with Plaid paint in black and let dry. I lightly sanded the edges then waxed with clear wax by Plaid Waverly Inspirations.


    Its all finished and ready for me to hang up using two black wood screws.  Thanks for following along with me.... Colleen :)


Friday, March 20, 2020

How to make a bird feeder using gourd pieces.


Oh Yay!! It's spring time at last! 🐦  Days are warming up and the birds are back.🐦  I think it is a good time to make a new bird feeder for the yard.   πŸ¦πŸ¦πŸ¦

Let's get started and gather our equipment
(1) large birdhouse gourd
1/2 or 1/4" welded wire
wire cutter/ pliers
short pieces of wire
Proxxon mini jigsaw
Proxxon OZI/E delta sander
leather or cord for hanging
eye hook
small awl
drill with 1/4" bit
(2) 1/4" dowels


Step 1-  Draw a line around the gourd at the level where you want to cut your top.    I used a tin can to support my pencil then turned the gourd to make my line.  This kept my line even all the way around.

Step 2-  I made a small hole below my line where I could insert my saw blade to begin my cut.   I used the Proxxon mini jigsaw to saw around the gourd. 


🠈This is what I found inside

Clean the inside of the gourd well.   This is going to be easy
on this one.   Sometimes the gourds are full of fluff.


Step 3-   repeat steps 1 and 2 to make the bottom of the gourd about 2-3" in height.

Sand everything well using the Proxxon OZI/E delta sander.  Gourd edges are very sharp!


Step 4- Cut the welded wire sheet to approx 6" x 16" and roll it to make a
cylinder.  Fasten the ends with small pieces of wire so it will hold it shape.


Step 5-  Using the awl make a starter hole in the middle of the bottom part of the gourd and insert the eye screw.

Step 6-- drill a 1/4" hole (about 1/2" from the top of the bottom piece).  Directly opposite drill another hole.   this is where you will inset a dowel- through the first hole, then through the wire cylinder and out the other side.  This holds the wire up a little ways from the bottom to allow the seeds to empty into the bottom dish.  It also secures the wire cylinder to the bottom part of the gourd and serves as a perch for hungry birds.   Do this once again with the other dowel on the other side.


Step 7-  On the top part of the gourd- drill a hole in the middle.  On your cord add two beads that fit the cord tightly.  With some effort you should be able to scoot them along the cord.   Through the hole in the top you are going to thread the 2 open ends of your cord down through the hole then tie them in a knot.  Next catch the loop onto the eye hook on the bottom part.  Push the top down onto the cylinder while holding your cord to secure the birdfeeder as one unit. Slide the beads down to maintain union.      To fill with seeds slide the beads away from the opening then simply pull the top up, fill with seeds and push it back down and slide the beads tight to the top


I think we are all done.    Time to hang it on a tree and wait for the birds to come.   And they will!!

I want to thank you all for visiting.   And I thank Proxxon for making such cool tools!

Have a great spring!    See ya next time    Carol

Thursday, March 19, 2020

How To Build A Colonial Mirror Using Proxxon Tools


  Hi everyone! I've been wanting to redo my powder room to make it look more Colonial / primitive. Most of my next few projects will reflect things I'm making for this room. I'm starting with a mirror. I'm using the mirror I currently have hanging on the wall in there because its beveled. I just removed it from the frame.

Supplies:

Proxxon table saw
Proxxon mini band saw
Proxxon drill press
1x3' select pine
3/8' birch plywood
Screws and brad nails
Plaid paint  black
Plaid Inspirations wax  clear
Wood glue

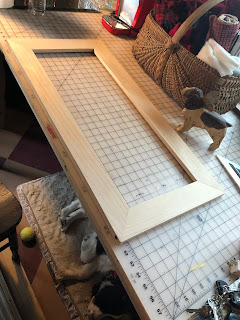
Now to make the new frame. I used 1x3" select pine. I figured out the dimensions by measuring the old frame & cut my pieces to length using the Proxxon table saw. I cut a notch in each of the four pieces.  This is where the mirror will sit.

Now I cut a 45 degree angle using the table saw on each end of the boards so I can assemble my frame.

     I screwed and glued them together                                                                                                        .
I drew a pattern for a decorative bracket for the top and bottom of the frame and transferred the pattern to some 3/8' birch plywood scraps I had. I cut out both brackets with my Proxxon Micro   Bandsaw.
I tried my mirror in the frame to make sure it fit. I then attatched the brackets to the top and bottom with wood glue and brads.
I dropped the mirror and broke it!!! Had to go get a plain mirror cut. The new mirror wasn't fitting quite right so I chiseled out the groove a little using my new Proxxon Micromot Carver.   I drilled a hole in the top using the Proxxon drill press for hanging Now I'm ready to paint. I used Plaid paint in black. After dry I lightly sanded the edges to distress it and finally I applied a coat of Plaid Inspirations clear wax.
Thanks for following along with me.... Colleen :-)

Wednesday, March 18, 2020

How to create Butterfly Wall Art

Hi everyone, Steph Ackerman here today creating butterfly wall art.


Do you have a little girl in your life who loves butterflies?  Here's an easy way to make any number of butterflies for her room.


Draw the design on foam, then use the Hot Wire Cutter to quickly and easily cut out the butterfly.


Paint the butterfly with assorted colors of Plaid paints.  I used lavender for the base.  Once dry, I placed a stencil on top and added purple and blue paints.  Black was added to the antenae.  To finish, I selected an assorted of dew drops from the Robin's Nest to decorate the butterfly.

It looks like she's flying, doesn't it?

Thanks for stopping by.


Sunday, March 15, 2020

How to Make an Oven Push/Pull Tool

Avoid those burned fingers with this oven push/pull. This is an excellent introductory scroll saw project.

Supplies and Equipment for the Oven Push/Pull

  1. Print the pattern and either trace or mount on wood blank. To mount the pattern on the blank cover one side of the blank with painter's tape. Mist the back side of the pattern with spray adhesive, and mount on the taped blank. The painter's tape made removal of the pattern easy without leaving any sticky residue.
  2. Cut the pull notch with the scroll saw.
  3. Mark the rounded corners on the top of the push/pull.
  4. Round the marked corners on the disc sander.
  5. Cut the push notch on the scroll saw.
  6. Sand all flat surface with the Delta sander using progressively finer grits of sandpaper.
  7. Mount the rotary tool in the drill stand and attach a sanding drum. Sand the push notch. 
  8. Wrap a pencil with a piece of sandpaper to make a custom sanding block for sanding the pull notch.
  9. Finish the oven push/pull with wood oil.
  10. No more burned fingers!!
Carole

Friday, March 6, 2020

How to make a simple necklace holder

Hi everyone.  I have a quickie project for you today but I think you are going to like it.   I know you gals have a lot of jewelry, but if you are like me I bet you have 5-10 necklaces that are your go to ones.   I used to keep them in my jewelry box but, always, always, always, when I went to get one I pulled out a ball of tangled chains.   Well today we are going to make a simple necklace holder that will keep those frequently used necklaces in order. 

Let's get started:    First let's gather our Supplies.   
You will need:
Pencil and paper  (graph paper if you got it) 
1/8" thick piece of wood,  I chose birch plywood approx  8" x 14"
3/4" 1" thick piece of pine approx 5" x 5"
Plaid paints for decorating
Sealer of your choice.

Equipment:

Let's get going!

First thing I did was to make a pattern.   You probably already know this but just in case you don't... I have always found the easiest way to make a pattern symmetrical is to fold a piece of paper in half and draw half the pattern on it.   When you unfold it it will be exactly alike on both sides-(much easier than trying to draw it out).  for this project all we need is a simple arc like the one I show below


You can see I used graph paper, that made the next step easier.   I want to mark out notches where the necklaces will hang.   I spaced them evenly using the graph paper as a guide. then I traced my pattern onto my wood.

Now comes the part I like.   I used the Proxxon mini band saw to cut out the main part of the pattern.   You could  easily use the Proxxon mini scroll saw for this part if you prefer.   I just happen to really like the Proxxon mini band saw and how easily it cuts.

I used the Proxxon mini scroll saw to cut out my notches.  You could use Proxxon's mini band saw for this part if you want, especially since they now have the very narrow band saw blade which makes extremely tight curves and corners.   I just like mixing it up a little so I used Proxxon's  scroll saw. πŸ˜€


 I cut my 3/4" pine piece of wood to 5" x 5" using the Proxxon mini table saw. Then I removed the blade cover/splitter in preparation for the next step

 
I lowered the blade height to about 1/2" and tilted the blade to 20 degrees.   We are going to make a groove for the upper portion of the necklace holder to sit in.   We want it to tilt back slightly to so the necklaces will lay nicely on it.  Using the fence as a guide I ran the board through the blade once then adjusted the fence just a hair out and ran it through again.  I checked the fit and it was perfect. 

*** Be sure to replace the blade cover/splitter now so it will be ready to roll for the next project.   Really the only time I take it off is when I am making grooves. It is there to shield you from the blade, and to prevent kick back.***     Safety first-don't get hurt!!


It fits well and won't even need glue.

Of course I used the Proxxon OZI/E delta sander to smooth every part.  

Lastly, I blinged the base up with Plaid paints. They make so many colors and textures and glitters and.... you can go wild!  I simply used a clear sealer on the top wood part because it was pretty wood.    And now it is all done.   What do you think?


Easy, fun, and useful.   Thank you Proxxon and Plaid.
and
Thank you all for visiting.   Give it a try.   It is so much fun making stuff!!!
catch ya next time   Carol