Friday, February 15, 2019

How to make a fisherman's wall hanging

Spring is coming....Yes it is a little ways off, but still, it is coming, and I am looking forward to it.
Today in celebration of spring, (albeit, a little early), let's make something that will help take our mind off the current cold snap.   Let's make a fun little sign.  It is easy and fun to do and if you have some kids you might be able to enlist them to paint the little fishies
.

Materials and Equipment:
Scrap wood ( I used some 1/2" pine for the fish and a small piece of 1/8" paneling for the reel)
small branch or dowel for the fishing rod
wire or string for the fishing line
small eye hooks 4 or 5
1/4 or 3/8" small piece of dowel  (only need about 1")
Proxxon mini drill press  (optional) or small drill
Plaid paintssap green, green forest, true blue, spring white, cardinal red, and black.
Plaid's glitterific paints purple and gold.

To get started I just drew some simple fish on my pieces of wood.  I drew out 3 of them then went to my Proxxon mini bandsaw to cut them out.  I used the really narrow bandsaw blade they have out now as it cuts curves as easy as any scroll saw.

When they are done I sand them using the Proxxon OZI/E delta sander.    I take time to round all the edges so my fish is not flat.  Also,
I used the edge of the sander to make fin-like indentations on the tail.  I think that came out really neat.

Note the rounded edges on the left fish.


I used the Proxxon mini drill press to put holes near their mouths where the hooks will go.

Painting was easy using Plaid's wonderful assortment of colors.  I dipped into my different greens and blues to paint the fish.  I let the colors mingle a little.


  After they dried I  wrote my messages on the fish  "Wishin I was Fishin", let that dry, then added Plaid's glitterific paint.  Wow!, that stuff sparkles just like a wet fish.


To make the fishing pole, I took a piece of an old branch that I had stripped the bark from and added eye screws 4 to 6 inches apart (like a fishing pole).  To make the reel I cut 3 circles, 2  from the thin  1/8" wood and one slightly smaller in diameter for the middle out of the 1/2 inch wood.  (Like a sandwich cookie)   The outermost layer of the "cookie" needs an offset hole where the handle (small piece of dowel), will be inserted.  
Next, run a screw through the holes into the fishing rod.  Put the small dowel in the offset hole. 

Wind some wire around the reel then thread it up through the eye screws in the pole.  I used some red wire to make hooks to put in the fish's mouths so they would show up. then threaded my fishing line through them.    
All done.   I used a very small picture hanger to hang it on my wall.    I'm sorry the picture just doesn't capture the Plaid paint's glitterific shine.   Wish you could see it.  


Thank you for visiting.   I look forward to seeing all your comments.  As always, I had a lot of fun making this.  With the right tools, (Thank you Proxxon) and the right paint and embellishments, (Thank you Plaid), it is all fun in the workshop.  
Try it, you'll like it.  👀
I look forward to seeing you next time.  Carol


Saturday, February 9, 2019

How to make a Candleholder by using Proxxon Tools


Materials Needed For This Project:

Drill w/ hole saw blades
Screws
Paint Brushes
Scrap Wood


To begin with I used my Kapro Measure Mate 313 to measure the length of my scrap 2 x 4 to the length of 14 1/2" and my scrap 1 x 3 piece of wood to length of 13 1/2". 


I cut the scrap pieces of wood with my Proxxon Band Saw to the measurements of 14 1/2" and 
13 1/2". I took the piece of 2 x 4, marked it and centered the 1 x 3 on top of it. I measured the center of the 1 x 3 for placement of the holes that I cut for my tealights and then I just eyeballed the placement for the two tealights on either side of it. Once I had them marked I used a hole saw blade that was 1 1/2" across to cut the holes for the tealights which fit inside perfectly. 


I used my  Proxxon Rotary Tool w/ Drill Bit to drill countersink holes for the screws that I used to put my two pieces of wood together.


After my wood was screwed together I used my Proxxon Delta Sander to smooth out the whole piece.


Here's what my wood looked like prior to using the Plaid Coastal Texture Paint (Sand Dollar)


Doesn't that paint look awesome? I only had to use one coat too! I was going to use the Plaid Glitterific-Red to begin with and then changed my mind and decided to use the Plaid Glitterific Paint-Clear Hologram which really does pick up or reflect on the color around it.


I loved the way this tealight holder turned out and it would look great as a decor piece for all the time. I'm going to be using it in another project with another product so stay tuned to see where it turns up next!

Proxxon Tools are really the bomb ya'll! You really need to check out their tools. While you're at it check out the Plaid website and see their products too. 
Please leave a comment as I read everyone.

Barbara


Wednesday, February 6, 2019

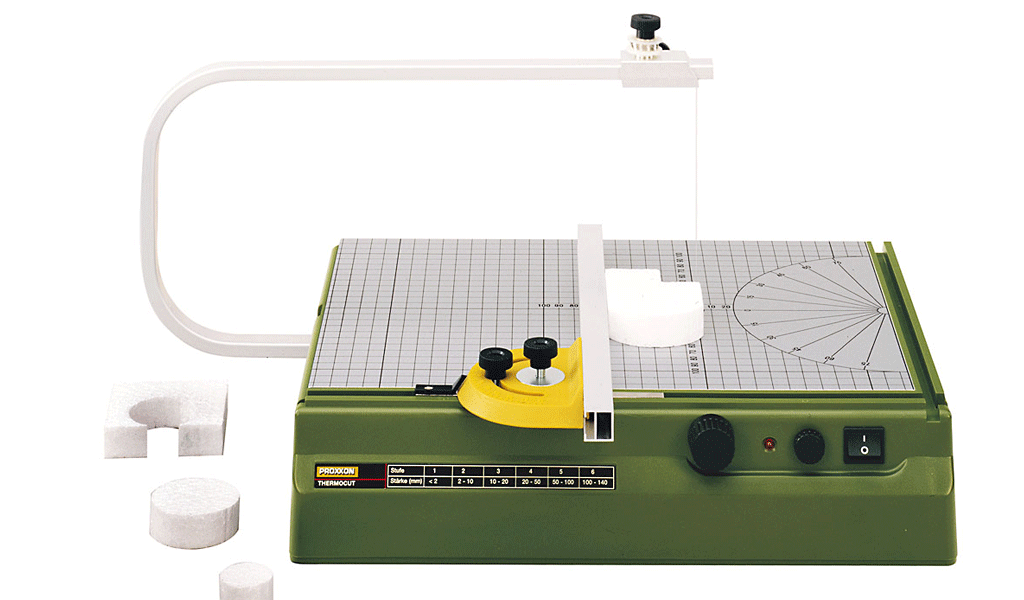
A Review of the Hot Wire Cutter

Hi everyone, Steph Ackerman here with another Proxxon review.  Today, I will share with you one of my favorite go to tools - the Hot Wire Cutter.  It was also one of the very first tools I got from Proxxon. 


The Hot Wire Cutter is a bench top unit approximately 15 1/2" x 11", allowing ample room to cut foam of any size.  The grid printed on the unit allows for even cutting.  The arm, extending approximately 5" over the unit, holds the wire and it is easily repositionable to cut a variety of angles.  The wire heats in less than one second so you can cut foam immediately.  The LED light reminds you not to ouch the wire.  The unit comes with approximately 90' of wire so it will last a very long time.

The Hot Wire Cutter is easy to assemble.  Removing it from it's packaging you simply adhere the arm and wire so set up is quick and easy.  It is literally a plug and go tool. 

Foam cuts like butter and you can even cut ribbon so it doesn't fray.

Here are some of the projects which I've created using the Hot Wire Cutter.  Click on the links for the complete project details.


I hope you give the Hot Wire Cutter a try.  I know you will love it!

Thanks for stopping by.


Sunday, February 3, 2019

How to Make an Adirondack-style Lounge Chair for an 18" Doll

Any little girl will be thrilled to be the recipient of this doll-sized Adirondack-style lounge chair. Their dolls will enjoy hours of relaxation as they lounge on the chair.

Supplies and Equipment to Make the Doll-sized Adirondack-style Lounge Chair

Instructions for Making the Doll-sized Adirondack-style Lounge Chair

  1. All of the 1" x 2" pieces are cut at a 35° angle on each end. The angles are parallel with one another. If using the table saw, adjust the angle stop to 35° and set blade height. 
  2. If using the chop and miter saw, release the table and move to 35°.
  3. These are the pieces from the 1" x 2" length of lumber.
  4. Sand the lettering off the paint stir stick with the Delta sander. You will only need 6", so there's no need to sand the entire length of the stir.
  5. Cut the stirs into 6" lengths using the bandsaw.
  6. Use the Delta sander to sand any rough edges on the 1" x 2" pieces
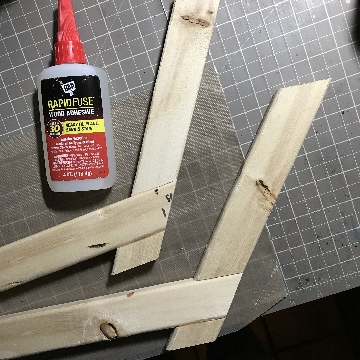
  7. Assemble the chairs, keeping the slope of the 35° angle. Glue the 1" legs onto the bottoms of the 9¾" seat supports. Let the glue set.
    Legs glued to seat supports
    1. Glue the 7" back support to the top of the 9¾" seat supports.
       
    2. Glue the 6" stirs in place. A.) Begin at the back of the seat, then position the front seat slat followed by the center seat slat. Glue the last two seat slats in place. B.) Turn the chair so it rests on the back. Begin where the back meets the seat, then position the top slat followed by the center back slat. Glue this in two stages, letting the glue set after the seat slats are positioned.
    3. Glue the last stir to the front of the chair.
    4. Paint the lounge chair.
    5. Plan a picnic or a pool party!!

    Note: I found the pattern for this doll furniture at 100 Things 2 Do.
    Carole

    Friday, February 1, 2019

    How to make a cowboy nightlight


    Today I am going to show you a couple of neat little tricks you can do using proxxon tools and a few household items.   The plan is to make a little accent piece that you could also use as a nightlight.  I am going to show you how you can bend some wood using the proxxon table saw and water.

    Equipment and Supplies:

    1/4" thick plywood piece large enough to fit your silhouette picture
    little branch pieces  (from the yard)
    small artificial tea light  (dollar  tree)
     Plaid apple barrel paint- black 20504E)
    paintbrush
    adhesive spray (optional)
    glue or glue gun.
    Drill and drill bit.
    around the house stuff:
    pan to hold water. 
     Weight to hold the piece down (I used a can of soup)
    roll of paper towel or other round object
    length of cord, rope, or shoestring

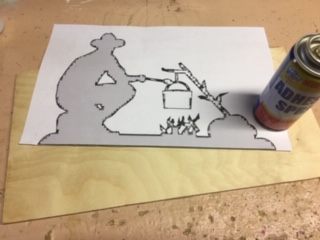
    The first thing I did was to choose a silhouette picture I thought would look good as a nightlight.  I chose this picture because I was thinking the light would look good as a campfire.  I cut it straight where the fire was on the picture.  We will provide our own "fire"

    I used the adhesive spray to temporarily affix it to the wood.  The next step is to cut it out.  I used the proxxon scroll saw for this.  For the inside cuts I first drilled a small hole and threaded my blade through the hole.
    After removing the paper from my wood, I sanded it all smooth using the Proxxon OZI/E delta sander.

    Next, we are going to use the Proxxon mini table saw.  First I removed the splitter and blade guard and lowered the blade to about 1/8" height.  Using the miter gauge I made lengthwise parallel cuts approximately 1/2" apart.  Notice I used the flat side of the piece against the guide to keep the piece square. 
    this is the backside after it was cut. 
     Notice the cuts are approximately halfway through the thickness

    Next, I put my cowboy in a pan and covered him with water.  Since wood floats, I placed a weight on it to keep it submerged.  I left it there for a few hours.   This softened the wood up a little bit.  Now I could bend it around the paper towel roll.  Any round object that is big enough will do.   I secured it with a strap and left it to dry.


    Now it has a nice curve

    Using Plaid apple barrel paint. I painted the whole thing black.  I also painted my little artificial tea light black, and added black smudges to my little branch pieces. These I glued onto the light to look like a campfire.


    When everything is dry, it's done!   Place the little light behind the cookpot.   It really looks like a campfire!   And it is going to look great in the dark!


    I had fun making this.    I ALWAYS have fun making stuff with my proxxon tools.  Thank you Proxxon.  They are the perfect tools for crafters and hobbyists.!  I know I only used black paint in this project, BUT, Plaid makes so many products.     Check em out at plaidonline.com    Guaranteed you will get inspired.    Thank you Plaid.

    Thank you SO much for visiting. 👍  Till next time, play safe.🔨   Carol


    Saturday, January 26, 2019

    Proxxon Tools help make the best Valentine Decorations!


    Well it occurred to me the other day that it's really not that far until Valentine's Day. I thought I would just put something together for the occasion. 

    Supplies Needed for this Project:

    Plaid Paints : Folk Art Home Decor Chalk Paint, White Adirondack
    Plaid Paint : Folk Art Home Decor Chalk Paint, Imperial
    Sandpaper
    Paint brushes
    Birch Plywood
    Red Twine
    Black Brush Tip Marker
    Vinyl 
    Cardstock
    Pencil


    To begin with you need to cut your wood down to size. I used my Proxxon Table Saw to accomplish the task. Just like cutting butter! This wood was a piece that I had left over from doing the chalkboard on the last post. The piece was 12 3/4" H x 13 1/2" W and I cut it down to 12" H x 10" W.


    The Proxxon Delta Sander has got to be the handiest sander that I have.


    I used it to sand all of the edges of the board that I was using. It made all of the edges very smooth and I also used it to take off any marks that were on the wood, such as pencil marks, and scuff marks. Once that was completed I took the time to draw three hearts onto the cardstock and cut them out. I used them for patterns and traced them onto some vinyl that I had and then cut them out of the vinyl. Next step was to paint the board both front and back with the Folk Art Home Decor Chalk Paint - White Adirondack next was to take the backing off of the vinyl hearts and eyeball where you want to place them on the board. After that was finished you need to paint the board with the Folk Art Home Decor Chalk Paint - Imperial. I used a piece of sandpaper and distressed the board by hand and then pulled off the vinyl hearts, which left white hearts showing through the red. Take your twine and wrap it around the board a few times and then tie a bow in the ends. Use your brush tip marker to write the word Love very small in the bottom heart. 


    There you have it! A very shabby chic piece of Valentine's Day decor. Now I placed mine in this holder but you could easily put a hanger on the back and hang it on the wall. This piece was fairly easy to make and I would recommend anyone with the proper Proxxon Tools!

    If you got any money for Christmas you might want to invest in some Proxxon Tools!

    Barbara