Hi everyone. Hope you are all enjoying early spring this year. I know it is a bit different than are usual with the virus and all, but I am choosing to look at this as an opportunity of time. We have time now to pursue our hobbies if we want to. Today I want to show you how to make a cute little birdfeeder. I saw something similar at my friend's house and thought it was cute, so I came home, drew a picture and then some plans. We can make this!!
Supplies and equipment:
1/4" plywood
1" nails
wood glue
clamps
6" of 12-14 gauge wire
chain or string to hang feeder
paint primer
sealer of your choice
First thing I did was to lay out my pattern on my piece of plywood. I chose to cut the tray pieces using the Proxxon mini table saw. It is soooo very much easier putting a "box" together if the pieces are cut straight and square. Proxxon's mini table saw is a precision instrument and perfect for this job. I used the fence to ensure perfect straight cuts.

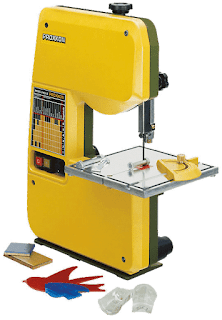
I used the Proxxon mini bandsaw to make my cuts in the chair part of this project.
Now that my pieces are cut, I will start the assembly. First to build the feeder box. I want to glue and then nail my sides to the bottom. I have only one corner clamp so I will do one corner first with glue and the clamp then let it dry well. I am determined to keep this thing square.
When it is dry I use small nails to add strength to the joint, then I do the opposite side.
To make the chair back from my cut pieces I lay out the back pieces and spread them so they have equal spaces between them. I want them to span 10 inches (across the back of the box.)and leave 1/2" at each end. Then I nail them to the back brace. The top of the brace should be 4 1/4" from the bottom. This is going to support the arm of the chair. Glue it then nail them.
Add the arm supports to the side of the chair and secure them with glue and nails, then lay the arm with the pointy end towards the back, supported on the back brace and the rounded end nailed to the supports.
Sand everything really well using the Proxxon OZI/E delta sander. This sander is made to get into all the nooks and crannies.
Time to decorate. But, first things first. This is going outside so I paint every exposed piece with some Kilz It primer. Pay special attention the the end grains as they are prone to suck up moisture if not sealed well. When the primer is dry. Paint as you like. I chose a beach scene. I used Plaid paints for their vibrant colors.
My plaid paint palette is as follows: 902 Taffy, 524E Calypso sky, 2050 Black,
20225E bright blue, 99262E Aqua sky, 21482E bimini blue, 21884E Snow white, 21473E pale daffodil.
When the paint is dry, be sure to seal it with the sealer of your choice. I used Krylon triple thick as it doesn't seem to break down or yellow when exposed outdoors.
To hang it I used the Proxxon professional rotary tool to drill a hole in each arm at the point where the chair would sit level. I determined this by using one finger to support the chair on either side till I found the perfect spot. Then I took my wire and made a loop slipping the other side through the hole where I bent it and it so it wouldn't slip out.
I suggest a light chain to hang it but I used clothesline cord because....well it is what I had on hand.😅
Find a pretty place and hang it. I've never had a bird feeder that the birds didn't love!!
Thanks for visiting. Thank you Proxxon for providing the fine tools used in this blog. And thank you Plaid for your fine paint. If you enjoyed this please leave a short comment so I know you've been here. Thanks so much!
Hope to see you next time. Take care, Carol


