Showing posts with label plaid paints. Show all posts

Thursday, September 30, 2021

How to make a kitty cat gourd bowl using Proxxon tools

 Hello again.  As promised I made another project using gourds and Proxxon tools.  I have been doing gourd projects for many years and have never found a better line of tools to do the work.  The tools are smaller and easy to handle yet have the power to tackle the job.  Anyway today we made a kitty cat gourd that I think you might like.  And it wasn't hard to do.  

Equipment and Supplies.

1 nice gourd that will sit well as a bowl.  (In other words it has a flat bottom or can be made to sit flat)

Proxxon mini jigsaw

Proxxon OZI/E delta sander and Proxxon mini bandsaw  (optional)

Plaid paints  Lots of different colors.

Proxxon mini torch or woodburner   + press abd seal + sharpie pen (optional)

Cat pattern or your choice of pattern that will fit the gourd.

gourd cleaning tools.   ie- any thing that works.  scrapers etc.

gloss spray sealer.


Let's get started.

The first thing I did was to get my pattern onto my gourd.  I use press and seal plastic wrap, a sharpie pen and and proxxon's mini torch as a  wood burner to transfer my pattern.  I traced my pattern onto the press and seal with my sharpie pen then laid the press and seal on the gourd and woodburned my pattern otno the gourrd.  You could use a pencil and simply draw your pattern if you prefer. 


The next thing I did was to cut off the top of the gourd.,  I didn't do any fancy cutting yet because I will need to clean out the gourd and I don't want to break any small pieces off.   I cut the gourd top off using the Proxxon mini jigsaw.  Note the adjustable speed dial in the first photo below.  


Next I want to cut out the top of my bowl.  I used the Proxxon mini jigsaw again.   This works so well since I can slow down the speed at the intricate parts.  I have connected parts of the picture so as not to have to cut too deep into the bowl.

Using the Proxxon OZI/E delta sander and my new proxxon cordless belt I sander I can get in all the nooks and crannies and mke everything smooth.  


Next it is time to paint.   This took a little while but was fun.  Plaid makes so many colors sometimes it is hard to choose.  


That is it.  I sprayed it with a little krylon crystal clear gloss to make it shiny and help protect the paint.

thanks for visiting.   Thanks to Proxxon and Plaid for awsome products
Till next time play safe    Carol


Thursday, March 4, 2021

St Patrick's day shelf sitter

 March...Time for St Patrick's day.   I love that nearly all months the have something to celebrate.  Today let's make a cute little shelf sitter to welcome in the festive time of leprechauns, shamrocks, rainbows, green beer, and friends.   This  blog is going to feature the Proxxon long neck angle grinder.  That is a powerhouse tool to be sure, and I had a good time working with it.   I think it is going to be a go-to tool in my workshop from now on.  Mine in the corded version but I hear they make a cordless rechargeable one now.  Wish list?      Christmas is coming ya know.     


I used a piece of 3/4" pine board for the majority of this project.

Tools and Supplies
3/4" pine board at least 4" wide
thin piece of wood for sign
wood glue
Plaid paints of your choosing
glitter spray or sealer 
small screws  (optional)  for reinforcing glued joints.

Let's start with a plan:

this is a full size plan if printed onto regular paper


I copied the plan onto my wood and cut it out all the pieces except the hands  using the Proxxon mini band saw.


Using the long neck angle grinder I made some texture in my little man.  This will stand out when we paint it.  

I left the hands on the longer piece of wood when I used the grinder on them.  the grinder is powerful and I didn't want it that close to my hands.  Where the fingers are I used to grinder to form a groove so that it will sit on his little sign and look like he is holding it.  After I was done with the groove I cut them out on the proxxon mini scroll saw.


I tapered his shoes with the long neck angle grinder so they looked pointy.    I shaped his pipe using the Proxxon OZI/E delta sander.   And I surfaced his little plaque with the angle grinder as well.


Time to put it all together

The body sits on top of the bottom  and is secured with glue and 2 screws.  The legs are attached to the front of his bottom piece and the shoes  are attached to the bottom of his legs.  The hands are glued to the top of the plaque, made to look like he is holding it up.   I drilled a small hole in the corner of his mouth and glued the pipe in.   


Now paint!   Plaid makes beautiful colors, and so many to choose from.   I suggest you paint before you place the plaque, just to make it easier.   Finish it off with some spray sealer or glitter, or..... whatever you like.     On your plaque write your favorite Irish saying.   I love this one.  

May the roof above you never fall in
and may your friends below it, never fall out. 

I'm going to set him above my front door.   


Thanks for visiting!!!   
Thanks Proxxon and Plaid!!    

Catch ya next time   Carol

Thursday, October 15, 2020

How to make an activated turtle pull toy

 Hi everybody.  I feel like it is time to make something for the kiddies. This is fun for me too.   I love making toys.  This was an interesting  project and I think it came out pretty good.  Gave me a chance to use a bunch of different tools and skills.   We are going to make a turtle with head and tail movements 

Check out this little short video, just to see the movement we are after


Ok playtime is over, let's  get started


Equipment and supplies 

Rounded gourd piece (something that looks like a turtle shell shape)

1/4" plywood piece (big enough to cover the bottom of the turtle shell

thin scrap wood

2 x 2" pine  approx 6"

4 small wood wheels

Wood glue

Proxxon mini jigsaw

Proxxon OZIE delta sander

Proxxon mini bandsaw

Proxxon disc sander

(2) 1/4" dowels 12" long

Plaid paints

Proxxon angle grinder (optional)

drill and drill bits


here is a rough outline of what we are going to do.


First thing to do is to cut the bottom off a gourd.  This is done easily with the Proxxon mini jigsaw.
set this aside for now.


Next draw a rough picture of a turtle head on the 2x2
 piece.   Do the same for the turtle's tail. Cut it out on 
Note how it is drawn on 2 sides.  We are going to cut this out on the Proxxon's mini bandsaw  to give us a rough shape of our head and tail to start with.


Next take the two pieces to the Proxxon disc sander and shape them into your head and tail pieces.


Back to the turtle shell.   Lay it on top of your 1/4" plywood piece and trace an outline on the wood.  Extend your line about 1/2" larger than the gourd "shell"  Then cut it out on the Proxxon mini bandsaw.

Note where you are going to put the head and tail and cut out a semi rounded notch that will fit the turtle's neck and tail.    Do the same on the gourd shell.  Make sure the head and tail will fit and have room to move.


Now for the mechanical part.
Wheels first.  

Drill a hole about half way through the wheel off center  see above.   Hopefully there is already a center hole that goes all the way through.  Make sure your dowel rotates easily in the center hole but is held tight in the offset holes. Cut 2 dowel pieces into 4" pieces.     Drill a generous hole in the turtles neck through which the offset dowel will go through and glue the dowel in the wheel holes.  Make sure the wheels are lined up with the holes in the lowest position.  Do the same for the tail.

Lay your head and tail wheel assemblies on the bottom of the turtle base and mark a square to be cut out that will allow the mechanics to be partially submerged into the body.
Cut out the square using the Proxxon mini jigsaw.


Now take your small pieces of wood you cut out earlier and drill a 1/4" hole where the offset axle will go.  See picture below.  I used tape on the dowel to keep the tail in the middle but really it did not need it.  Note the centered axle is just a short piece of dowel glued into the hole and the wheel spins freely on it.
 

Glue the turtle shell onto the bottom of the turtle with mechanics inside. The raised piece we glued to the bottom goes inside the turtle shell.


Glue some feet on and paint your turtle.  On the picture above I used the proxxon angle grinder to carve a pattern on the turtle shell.  this step of course in optional but fun to try.

I used plaid paints to paint my turtle.  Then I attached a string to make him a pull-toy.  He works good.  His tail and head really get moving.   I think the kids will have some fun with him.👧👨
 
Honestly it wasn't that hard to make.  It took a little patience is all.   Thank you all for visiting.  Thanks to Proxxon, my favorite tool maker!, and Plaid my favorite paint maker  
Catch you next time....  Carol


Monday, August 24, 2020

How to Make Decorative Flip Flops

Hi everyone, Steph Ackerman here today showing you how to create a set of decorative flip flops to  remind you that summer is still ongoing even if we are summering in place this year.


I drew the shapes on a sheet of plywood, then used the Scroll Saw to cut them out.  I found it easiest to cut the plywood panel first so I could work with a smaller panel.


The Scroll Saw makes easy work of cutting the flip fops.


Next, I sanded the edges with the Delta Sander.  This is my go to sander.  With it's shaped sanding surface, I can get into the smallest of areas.


The Bench Drill Press easily cut the holes in each flip flop.


I used Plaid's Folk Art Paint to paint the flip flops.  Once dry, I used a stencil with Plaid Folk Art Paint to create the design on the flip flops.


To finish, I inserted ribbons in the holes and added a flower.  Now, I just need to hang these on my wall to remember that summer comes every year.


Thanks for stopping by.


Steph


Friday, July 3, 2020

How to make a Swinging Chicken coat hanger

Hi everyone, Carol here.   I have a special project today.   Our neighbor's granddaughter is turning 9 years old and I want to make her something special for her birthday.  
They raise chickens and goats next door so I had a choice.    For this project I chose chickens.   Goats wait your turn.   They have a young grandson as well..   ðŸ‘¦ A project featuring goats is likely in the future.  


Let's get started.

Supplies and Equipment:

1" x 2" pine board about 7 feet long
1" x 6" x 18" pine or plywood.  Or (3) pieces of 1" x 6" x 5"
Proxxon mini drill press and drill bits
(6) straight 3" nails (minus nail heads)
(8) 1 ½" wood screws
Plaid paints of your choice.
2 small picture hangers
Wood glue


I used the Proxxon Mini table saw to cut my frame pieces to size. 
  I cut 4 pieces of the 1 x 2 to 16" lengths
and 2 pieces 5" long.   I put these aside for now


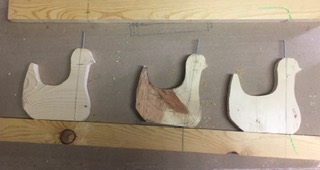
I free handed a chicken onto a piece of my larger wood.   I wanted her to be about 5" tall and 5" wide  I made sure she had a tail that could act as a " hook"   We need 3 of these

I cut the chickens out using the Proxxon mini band saw.

The next part is optional but recommended and actually kind of fun.
Using the Proxxon professional tool with the router base and chamfer bit I routed around the edges of the chickens to soften their edges. It was a little bit messy but worth it.  


After that I used the Proxxon OZI/E delta sander to smooth the edges even further.


Before and after


I need a hole in each head and each bottom.    The drill press allows me to make perfect perpendicular holes which is important so that the chickens can swivel.  


We need holes in the frame pieces as well.   Line up the chickens and place the nails in the chicken's head mark where the holes will go.  Then off to the drill press.  The holes in the top and bottom frame pieces will line up exactly.  Drill the holes in the center of the 1" side of the frame piece at your mark.


Ok, we still have 2 long frame pieces.   That is because I forgot that when we turn the chickens to use the hook the wall will prevent their turn.  So... glue the long pieces to the back side of the existing long pieces to make it thicker.  We are going to turn the end pieces on their side to complete the frame...in a little while.

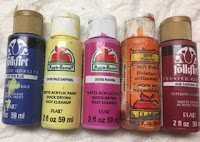
Now take it all apart and paint it.   Plaid makes so many pretty paints.
 
.
Now,  put the nails in the ducks and then in the frame and using wood screws put the frame together by securing the sides to the top and bottom.    And it's done.  Don't make it too tight, the chickens need to swivel.

All it needs now is some picture hangers on the back and it is ready to hang.   Hope Emma likes it.


I had fun with this project.   I think just about any animal or whatever might work so long as there is something that can be used as a hook.    Customize it for any kid.

Thanks for visiting.   Thanks also to Proxxon and Plaid for their contributions of tools and paint.
Hope you try this.   Leave me a comment if you can.   Thanks again   Carol