Showing posts with label mini drill press. Show all posts

Friday, September 4, 2020

How to make a discrete password book using old gift or credit cards

Hi and welcome back.


 Ready for a quick and easy project, that solves an annoying problem, and recycles some useless stuff you already have in your home?
 We are going to make a a little book to hold your passwords that will fit in your purse because it is the size of a credit card.  In fact it's made from old gift or credit cards.


Look what I found when I cleaned out my drawers today.


Tools and supplies needed:
2 old credit or gift cards
1 rather stiff approx 1/2" diameter spring
2 pliers
paper cut to size
small drill bit
masking tape
rubber bands


Choose 2 credit/gift cards   Note the small spring sitting there


The spring needs to be stretched to the size of the credit card.  hold the ends and pull gently to lengthen it to aprox 2".  Set this aside for now.


 Cut paper to the size of the gift cards.   I used about 3 sheets of regular paper cut into 36 small sheets for my little book.


 Place the sheets between the 2 cards and secure them tightly with 2 rubber bands.


 I placed a piece of masking tape on one end of the cards so that I could mark where I am going to drill my holes.   Holes needed to be 1/4" apart and approx 1/4" from the edge of the card.


 Using the Proxxon mini drill press equipped with a small drill bit drill through all the layers of the "sandwich" we just made.   Leave everything rubber banded together.


Now take the stretched spring and start it in the first hole. 


Twist the spring while guiding it through the subsequent holes


 Look! we made a little spiral notebook.   ðŸ˜€ðŸ˜€ðŸ˜€


 And look how it fits in my wallet.   Now it will be with me when I need it.

Wasn't that quick.   I LOVE making something out of basically nothing.   Thank you Proxxon tools the drill press made making this super easy!!   You really should check out their tools.  Made especially for the crafter in all of us.  

Thanks for visiting.   Hope to catch you next time.  I got something pretty to show you.    Meanwhile stay safe!!   Carol

Friday, July 17, 2020

How to make a custom picture frame

Hi guys,  I got a new little tool I have been dying to try out and show you.   Its the Proxxon mini chop/miter saw.   I have tried every tool in the book, (minus a chop saw), to make decent mitered corners, but no matter how careful I am, it seems impossible.  In fact I consistently have to revert back to other joints just to save my sanity.   Well now... with this new little mini chop saw by Proxxon,  I must say, and without boasting, I can make the most perfect miter corners!   Ok, now that brings to mind picture frames for me.   I have taken art classes and have had to buy custom frames because, caught in the creative moment, I never paid attention to making my creations standard size.  Well, that took a bite out of my pocket change. But NOW, I can frame any size really.    In the following I am going to show you my learning process on this new tool.  There were a few snags, but I was able to conquer them.   And now I know what is easily doable and what is doable with a little more effort.  Follow along with me.
 My picture prior to framing was 14 1/2"  x 10 1/2"


Supplies

5-6' of baseboard material ( your size may vary according to picture size)
plexiglass large enough to cover your picture.
wood glue 
corner supports (4)
small wood screws  3/8"  to 1/2"
Stain, paint, or whatever 
picture hanger of your choice

Equipment

Proxxon mini drill press   (optional)
wood clamps
Square or corner clamps

The first thing to do is to measure your picture.
  I then made the same measurements on my baseboard, this is going to be the short side of the miter on each side  Measure the red side and set the miter gauge to 45 degrees.
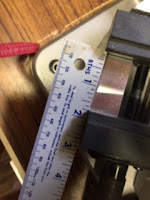


    This is when I discovered that this saw really is made for small cuts.  The clamp opens only to 1 3/4".   Ok, I can deal with that so it is off to the Proxxon mini table saw to cut my baseboard a wee bit narrower.   I saved the strips I cut off.   I have plans for these later.


Now back to the the Proxxon mini chop saw.  

OOPs, although it cut a beautiful miter angle, it did not cut the entire length.   This is my fault, (getting anxious and not reading my instruction booklet),  but we can fix it easy.

I took the partially cut pieces to the proxxon mini bandsaw and using the miter gauge there I followed the saw kerf to finish the 45 degree angled cut.
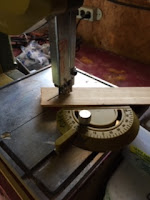

 yay, check it out.   

Now I have the pieces for the outside of the frame and the miter corners fit perfect!  Yay Proxxon mini chop saw!!!

Sand everything with the proxxon OZI/E delta sander.

Next step I glued the corners using a square to keep them square.  We will reinforce the joints later.

Then I take the  little strips I cut from the baseboard earlier to the Proxxon mini chop saw and cut  them at 45 degree angles on the Proxxon mini chop/miter saw so they would fit perfectly inside my larger frame.  

I used an orange gourd stain to color my inside frame piece hoping this will bring out the colors of my sunset.  (This is your time to be creative and paint or stain however you like.)  
  
Now  I'm going to glue these in so they sit about 1/4" higher that the outside frame.  This creates some depth and interest in the frame and 😄 it is giving me a ledge on the backside of the frame where my picture and plexiglass will rest.  I glue it, clamp it, and leave it to dry.  


To reinforce the frame I add corner braces to each corner.

Then I measured the plexiglass to the exact size to fit the ledges I made on the backside of the frame, and used masking tape to make my marks.  I used the proxxon mini scroll saw to do the cutting.   I turned the speed down slow so as not to melt the plexiglass.  I love the adjustable speed control!

Time to flip the frame and fill it up.   I remove the protective film from the plexiglass and lay it on the ledges.  Next comes my picture which I lay on the plexiglass.   I add a piece of cardboard on top of that to hold the picture tight.
Now I need to make something to hold the "sandwich" together.  


I took some scraps of my plexiglass and cut them into rectangles measuring approx 3/4" by 3".  Then I drilled a small hole at each end using the proxxon mini drill press.   I lay these pieces diagonally across my corners and use small screws to secure it all.


Add a picture hanger of your choice, then hang your picture.  

Wow, start to finish, picture and frame,  it is all yours!  Now you can make any size picture then frame it yourself.   Feeling inspired, I went to "the store" and looked at all the trim and baseboard materials they have.  I am going to make some really fancy frames!    I learned a lot with this project.  Can't wait to go at it again.

I want to thank you all for visiting.  I love sharing with you.   I also want to thank Proxxon tools for making the tools that make making fun and easy.  These are small and unscary tools, made for the creative crafter in all of us.    Come back soon and we will make something new.   Carol

Friday, July 3, 2020

How to make a Swinging Chicken coat hanger

Hi everyone, Carol here.   I have a special project today.   Our neighbor's granddaughter is turning 9 years old and I want to make her something special for her birthday.  
They raise chickens and goats next door so I had a choice.    For this project I chose chickens.   Goats wait your turn.   They have a young grandson as well..   ðŸ‘¦ A project featuring goats is likely in the future.  


Let's get started.

Supplies and Equipment:

1" x 2" pine board about 7 feet long
1" x 6" x 18" pine or plywood.  Or (3) pieces of 1" x 6" x 5"
Proxxon mini drill press and drill bits
(6) straight 3" nails (minus nail heads)
(8) 1 ½" wood screws
Plaid paints of your choice.
2 small picture hangers
Wood glue


I used the Proxxon Mini table saw to cut my frame pieces to size. 
  I cut 4 pieces of the 1 x 2 to 16" lengths
and 2 pieces 5" long.   I put these aside for now


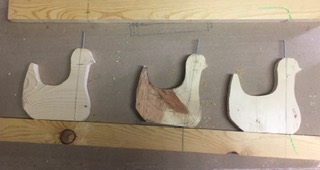
I free handed a chicken onto a piece of my larger wood.   I wanted her to be about 5" tall and 5" wide  I made sure she had a tail that could act as a " hook"   We need 3 of these

I cut the chickens out using the Proxxon mini band saw.

The next part is optional but recommended and actually kind of fun.
Using the Proxxon professional tool with the router base and chamfer bit I routed around the edges of the chickens to soften their edges. It was a little bit messy but worth it.  


After that I used the Proxxon OZI/E delta sander to smooth the edges even further.


Before and after


I need a hole in each head and each bottom.    The drill press allows me to make perfect perpendicular holes which is important so that the chickens can swivel.  


We need holes in the frame pieces as well.   Line up the chickens and place the nails in the chicken's head mark where the holes will go.  Then off to the drill press.  The holes in the top and bottom frame pieces will line up exactly.  Drill the holes in the center of the 1" side of the frame piece at your mark.


Ok, we still have 2 long frame pieces.   That is because I forgot that when we turn the chickens to use the hook the wall will prevent their turn.  So... glue the long pieces to the back side of the existing long pieces to make it thicker.  We are going to turn the end pieces on their side to complete the frame...in a little while.

Now take it all apart and paint it.   Plaid makes so many pretty paints.
 
.
Now,  put the nails in the ducks and then in the frame and using wood screws put the frame together by securing the sides to the top and bottom.    And it's done.  Don't make it too tight, the chickens need to swivel.

All it needs now is some picture hangers on the back and it is ready to hang.   Hope Emma likes it.


I had fun with this project.   I think just about any animal or whatever might work so long as there is something that can be used as a hook.    Customize it for any kid.

Thanks for visiting.   Thanks also to Proxxon and Plaid for their contributions of tools and paint.
Hope you try this.   Leave me a comment if you can.   Thanks again   Carol