Showing posts with label proxxon mini bandsaw. Show all posts

Thursday, March 3, 2022

How Proxxon tools make fixing things easy peasy


Hi again.   Hey, I want to show you what a bargain I got just the other day and how I was able to fix it up easily using Proxxon tools.  


I don't think it shows very well but the clock has a piece broken out of the black face part.  The numbers are intact and the plexiglass cover is in good shape.  This is an easy fix using Proxxon tools.  A bargain for sure as the clock is oversize and really big. 
Next I took the OZI/E delta sander and sanded the edges round.  It's a nice piece of plywood so I am not even going to paint it.  P.S.  I love this little sander.  The sandpapers are attached by hook and loop, so you can go from coarse to fine without wasting the sandpapers.  Just set them aside and use them next time

This small dish covers the broke out area so I will use it as a template,

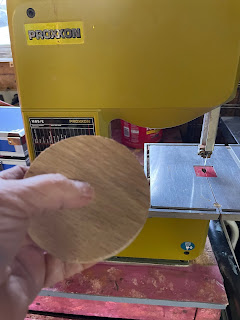
I traced out the circle on a thin piece of thin plywood then cut it out with the Proxxon mini bandsaw.


I drilled the center hole where the clock works will extend through using the Proxxon mini drill press and the Proxxon cordless rotary toolor


r


Now a little glue and a little weight to hold it tight, I left it to dry good, then reassembled the hands of the clock and put the cover back on and now I have a nice clock, and it looks better than ever. And at $2.29 it was a real bargain.


It keeps good time

thanks for visiting.  Catch ya next time.  👍🔨🔨

Thursday, April 15, 2021

Home repairs using Proxxon tools

 Hi everyone.  Accidents happen, don't they.  Look what happened to our shed.  There's a hole in the wall.  I don't really know what happened but good grief, look at that hole!  👀  I don't want to have to replace the whole panel so we are going to patch it, but I don't want it to look patched, so we will patch it with something decorative.   I am going to use Proxxon tools to fix this and it is going to look better than ever.


Looking around the shop for something to patch this with.  Aha... I spy an old license plate and I know I can cut it easily using the Proxxon mini bandsaw so I drew a simple pattern onto it.  I like sunshine so I drew a simple sun then cut it out using the Proxxon mini bandsaw.  


That was really easy.  I do recommend ear protection when cutting metal because it is a little noisy,  Of course always, always, always, wear eye protection in the shop !!


I used the Proxxon rotary tool with a metal sanding disk to take off the rough edges.   Next time I would choose something less pointy.   I always learn something with each project.

The next challenge was to attach it to the shed wall.   I don't think the siding on the shed would stand up to nailing or screws.  Hmmm.    I decided to cut a thin piece of wood and stick it to the inside of the wall and that would give me something to screw into.  The picture below is just how I stabilized the wood while waiting for the glue to dry.  This is inside the shed.  The wood piece is covering the hole.


Next I used the Proxxon mini drill press to make 5 tiny holes in my sun's rays where I will insert the screws to fasten the sun over the hole in the shed.


I painted my sun with Plaid paints, let it dry well, then sealed it with krylon triple thick gloss sealer.


Off to the shed.   I brought with me my cordless Proxxon rotary tool equipped with a small drill bit and predrilled my 5 holes through the sun, through the siding and into the plywood patch inside.  Then I fastened them all down securely with screws.  This little patch isn't going anywhere.   I think it looks cheerful.  and was a whole lot cheaper than new siding.  


Bonus tip.    I have a terrible time trying to squeeze glue out of the bottles they come in.  This is how I solved my glue problem.   I emptied the glue into a empty water bottle that had a sippable top and closure.  I used a rubber band to attach the original label so I have directions.   OMG  life is so much easier now that I can squeeze the bottle.  EASY SQUEEZY and it doesn't clog up.


Well thanks you for visiting.   I use Proxxon tools everyday to fix and repair.  Thank you Proxxon for that.   And thank you Plaid for adding color to our lives.  Till next time...Carol


Thursday, April 1, 2021

How to make fun salad tongs

 Hi everyone.   Today I have a fun and silly yet possibly useful project.   It's hard sometimes getting the kiddos to eat their vegetables isn't it?  Maybe this will help.  We are going to make some salad tongs that hopefully appeal to the kids.   Hoping they have fun using the salad hands, and this will get them to eat more salad.  Farfetched??? maybe, but one could hope.   Anyway it is a fun project, and features the Proxxon long neck angle grinder.   Lets get started.


Equipment and supplies

5/8 -1" pine board

Proxxon mini bandsaw

Proxxon long neck angle grinder

Proxxon OZI/E delta sander

Plaid paints

Butcher block non-toxic food safe sealer

Wood glue

Dust mask


The first thing I did was to pick out some scrap wood, this is 1" pine left over from some other project.


I drew an outline around my hands onto the wood pieces.  (If you have kids, get their hands involved).


Next we cut out the hands using the Proxxon Mini bandsaw.  I love that it is so easy to use.


Next we will use the Proxxon long neck angle grinder to grind the hands slightly concave and the tips  of the fingers into a grasping position.   (see photo below).   Caution,  be careful and keep your hands away from the grinder.  This step is NOT for children!  Please use a dust mask for this part, It gets a little messy and a lot dusty.


When I got the basic shape, I took my hands over to the Proxxon disk sander and continued the shaping, ie smoothing the joints of the hand and rounding all the edges.


To add handles, just cut out a half circle from the leftover wood.   Optional- grind out the middle a little bit to make hand holds.   Then glue it on to the back of the hands.


Finish the smoothing process using the Proxxon OZI/E delta sander.


I used watco butcher block sealer on the palm side of the hands (non-toxic and food safe) and I used Plaid paints on the back of the hands for decoration.  


Once dry we are ready to dig into the salad, or better yet the kids will dig into the salad!


Thanks for visiting.  Hope you enjoyed this little project

Thank you Proxxon and Plaid

See ya next time....meanwhile, eat your vegetables!   Carol


Thursday, March 4, 2021

St Patrick's day shelf sitter

 March...Time for St Patrick's day.   I love that nearly all months the have something to celebrate.  Today let's make a cute little shelf sitter to welcome in the festive time of leprechauns, shamrocks, rainbows, green beer, and friends.   This  blog is going to feature the Proxxon long neck angle grinder.  That is a powerhouse tool to be sure, and I had a good time working with it.   I think it is going to be a go-to tool in my workshop from now on.  Mine in the corded version but I hear they make a cordless rechargeable one now.  Wish list?      Christmas is coming ya know.     


I used a piece of 3/4" pine board for the majority of this project.

Tools and Supplies
3/4" pine board at least 4" wide
thin piece of wood for sign
wood glue
Plaid paints of your choosing
glitter spray or sealer 
small screws  (optional)  for reinforcing glued joints.

Let's start with a plan:

this is a full size plan if printed onto regular paper


I copied the plan onto my wood and cut it out all the pieces except the hands  using the Proxxon mini band saw.


Using the long neck angle grinder I made some texture in my little man.  This will stand out when we paint it.  

I left the hands on the longer piece of wood when I used the grinder on them.  the grinder is powerful and I didn't want it that close to my hands.  Where the fingers are I used to grinder to form a groove so that it will sit on his little sign and look like he is holding it.  After I was done with the groove I cut them out on the proxxon mini scroll saw.


I tapered his shoes with the long neck angle grinder so they looked pointy.    I shaped his pipe using the Proxxon OZI/E delta sander.   And I surfaced his little plaque with the angle grinder as well.


Time to put it all together

The body sits on top of the bottom  and is secured with glue and 2 screws.  The legs are attached to the front of his bottom piece and the shoes  are attached to the bottom of his legs.  The hands are glued to the top of the plaque, made to look like he is holding it up.   I drilled a small hole in the corner of his mouth and glued the pipe in.   


Now paint!   Plaid makes beautiful colors, and so many to choose from.   I suggest you paint before you place the plaque, just to make it easier.   Finish it off with some spray sealer or glitter, or..... whatever you like.     On your plaque write your favorite Irish saying.   I love this one.  

May the roof above you never fall in
and may your friends below it, never fall out. 

I'm going to set him above my front door.   


Thanks for visiting!!!   
Thanks Proxxon and Plaid!!    

Catch ya next time   Carol

Thursday, February 18, 2021

Table top picture holders

 OMG I got the best idea for all you travelling artists.  So simple, convenient, beautiful, and PORTABLE.   This is a table top picture holder.   Check it out!  Using Proxxon tools it takes about 10, ok...20 minutes to make.


Easels are so cumbersome when travelling, but pictures won't stand up by themselves.  I got a solution and when travelling you can throw a dozen of these in a box and I promise they won't break

Supplies and equipment needed.

Scrap lumber  1/2' to 3/8" ;thickness works well  12-14" long  2" wide

Proxxon mini bandsaw  or Proxxon mini scroll saw

Proxxon OZI/E delta sander      

Finish of your choice

Here is a template to go by.  This pretty much holds most of my framed pictures, however, if you have a larger picture you can adjust the height at the curve and the size of the opening to pretty much accommodate any size.   Really big pictures may need added length.  


After choosing some appropriate lumber, I transferred my pattern onto the wood then I used the Proxxon Mini bandsaw    to cut out my pieces.   


Next, I used the Proxxon OZI/E delta sander to smooth everything.   I used the sander to round over the edges a little to give it a finished look.   I love this little sander.   I used the 80 grit coarse paper to start.  


After I applied a finish, I sanded it lightly using 240 grit and applied another coat of finish.   It  is really  smooth and looks great.   What I find really neat about this sander is the hook and loop system of attaching the sand paper.  I can take the coarse paper off and put on some fine paper, but then I can \put the coarse back on and don't have to waste any when I need to change grit.

 There it is all done and doing it's job.   I am making a bunch of these for my art class.

Thanks for visiting.   Thank you Proxxon for making the tools that make making fun,
Till next time, stay safe   Carol