Showing posts with label beads. Show all posts

Tuesday, March 21, 2017

Inspirational Necklace "When Doors Open" By Sherri Welser and Proxxon Tools!


Inspirational Necklace "When Doors Open"

Create this beautiful inspirational necklace by using Proxxon Tools!

Wearing inspirational pieces always helps to reinforce that feeling of joy and hope. In this necklace I used a metal embosser ( Vintaj  Big Kick) to get the lovely texture on the  copper metal pieces and the  Proxxon Bench Drill Press TBM 115  . I have had these 2  metal door pieces for awhile and was waiting for the right project to use them. Below please find the supply list and instructions!

~Supply List~
Proxxon Bench Drill Press TMB 115
Vintaj Big Kick
Rose patterned embossing folder
2 copper metal "door" pieces
Verdigris paint
Brass or copper wire ( 24 gauge) about 6 " long
Seed beads 8/0 or 15/0
WeldBond adhesive
Type setting  paper word phrases or letters 
jump ring~ 6mm
Copper or brass chain ~Approx 24" long
Lobster claw closure ( copper)\
Small copper piece for "window
Small metal clip

I began with the copper metal doors and even though there were holes, they wernt big enough for attaching the wire and still being able to open the doors freely. 
1) Paint the verdigris paint on the front of the door and the small square metal piece~ let dry
2) Set up the Big Kick and place your metal door and window pieces in between the folder and pass through the Big kick to create the  embossed pattern.


3) Re-drill the holes a bit larger with the Proxxon Bench Press in both doors

4) Cut to size the words for the inside of the door

  5) Glue in place with the WeldBond


6) Next glue the small "window" piece to the front of the door and secure tightly to dry with a clip


7) To connect the front to the back doors take your 24 gauge wire and put it through the first hole from back to front 


8) Add several seed beads and twist the wires together.

9) Weave through the bottom wire , adding beads and twisting for a fun effect. Making sure you can still open and close the doors.


10) Attach the chain by adding the jump ring to the door and then putting the chain through the jump ring.


The door may tend to open so if you want add a tiny piece of velcro or something similar to keep the door closed until you want it to open.
Have fun Creating!

Tuesday, April 26, 2016

~Vintage Embellishing~ Proxxon DT Project by Sherri Welser

~Vintage Embellishing~

"Adorn your Special Projects"

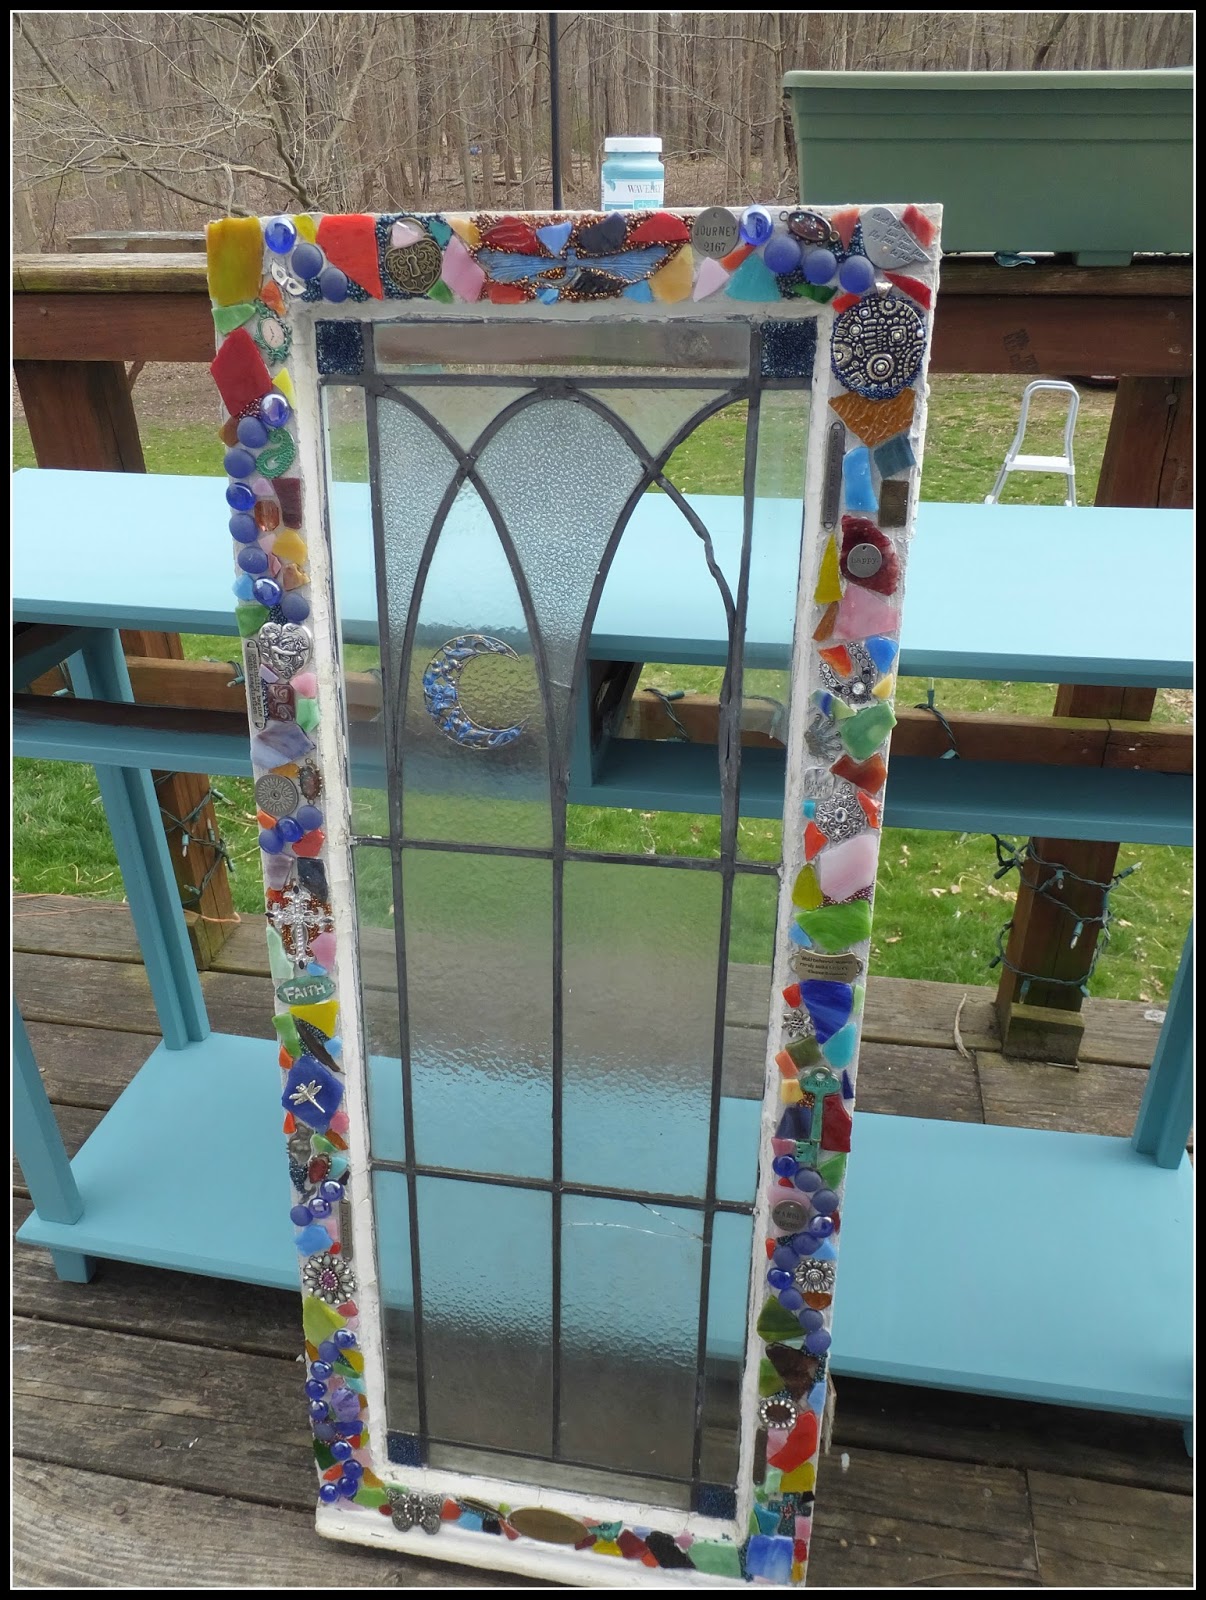
Even before it was a "Thing" I was perusing garage and estate sales looking for fun items to reinvent! I would find all kinds of tables and do the faux marble tops, a church pew was placed in the garden for setting plants on,old bicycles with the metal baskets were planted with flowers and they became unique focals in the flower garden. I have always loved finding these treasures and turning them into  Garden Art! Last fall I found an old church window with beautiful lines and even though some of the glass was broken I had a vision! Recently I found both a long wooden table and an old  wooden sewing machine table( both inexpensive finds at my local ReStore) with the beautiful metal work on it and the word "Singer" across the bottom~ these all are on my radar now to make beautiful again and here you will see several of those items come to life! The church window is finished with beautiful embellishments, words of inspiration,  charms, stained glass, glass beads ,jewels and trinkets of special meaning. In this week's part 1 of 2 posts, I will show you how I prepared the wooden table with fun examples of embellishing. Next time I will show you how I go about embellishing the table itself. This table will be put outside my art studio and used as a serving buffet at the fire pit area. Extra care will be taken also to prep it for outside use. For Part one I have included the supplies below.

~Supplies~
Wooden table of any size
Chalk Paint- ( I used Waverly in Agave)
Chalk Paint natural bristle brush

I began by painting the table with the chalk paint and using the round natural bristle chalk paint brush. I provides a nice even coat when brushing on.


Because I want the look to be "distressed" I am not concerned too much about "perfect" application of the paint. I just want to get a nice coat of paint on and let dry.

Once fully dry, using the Proxxon sander with a medium coarse grit sanding pad I start to "distress" the edges of the table to give  it that worn and aged look.


Now that the table is prepared for the creative part I will share with you some embellishing ideas below!


I use a lot of unique beads, jewelry findings, metal charms, inspirational charms, stained glass,and fun odds and ends to create the mosaic type feature that I am going for to adorn these vintage items.


So get your table ready and next time we will have so much fun embellishing the table top with all of these fun and unique items for a beautiful one of a kind piece!! See you next time!

Tuesday, January 5, 2016

New Design Team Project for Proxxon ~ StoryTelling Sticks~


" StoryTelling Sticks" Aka "The Talking  Stick"

I am fascinated by Native American culture and ways, so I decided it would be a wonderful project to create these StoryTelling Sticks or as the Native Americans say " Talking Sticks". There is a rich history in the use of these Talking Sticks" at community gatherings. The person who would be speaking would be given the "Talking Stick"  to speak his "truth" and not to be interrupted by others. Only the person holding the Talking Stick would be allowed to speak. There is much meaning behind the creation of the Talking Stick as well. Everything used to created the stick has meaning from the wood used, to the bead colors, paint colors, fur, gemstones etc. And although a Talking Stick can be used to speak one's voice, it can also be used by a Storyteller and to document the stories told . Charms  with ribbons and  a connection to the story being told can be attached to the end of the stick with ribbon, this way each story is documented. More information can be found by doing a search on the internet and I also have gathered some information below for you on Talking Stick Circles.

*Talking Stick Circle Guidelines (David Boje & Joe Gladstone, 2008) 
1. We sit in circles, not pyramids.
2. The person with the Talking Stick is the designated story-talker.
3. Pass the Talking Stick clockwise. Start with the person sitting in the East-most position, then go to the right. In Talking Stick going clockwise is an earth-process. Otherwise the magic is undone.
4. Persons without the Talking Stick, please listen, write notes, and notice the story. Focus your listener attention on the storyteller with the Talking Stick. Let your mind recall stories as the teller tells stories.
5. Try to limit interruptions. A person with the Talking Stick can pass it to someone for a clarification, question, or amplification on a point, then call the stick back to finish their story.
6. There will be multiple rounds of Talking Stick Story Circles. Each time there is a question. At the end of a round of story-sharing, story-noticing (story-listening), a spokes-person repeats the main themes, issues, resolutions, and proposals that came up. So be sure to take notes.
7. The output of Talking Stick Circle is ideas, proposals, and stories of a vitalized community. Designate people to listen, to observe, and to provide a report out of the collective story that is emerging in the Circle.
8. The point is to create a collective story, one that is faithful to everyone's living stories, to unify in community.

This was such a wonderful project using  art,intention, purpose and meaning.I hope you enjoy creating them as much as I did!

~Supplies~

Wood pieces about 3 x 11
Drill for holes
Acrylic Paint
Distress Stain ( I used Tim Holtz)
Tribal stamps ( I made mine)
Stamp pad
Glue Gun
Ready made suede tassels ( or you can make one)
Gemstones
Carved  gemstone feathers or other shapes
Iron metal focal
 Jewelry Wire for stringing the beads
Assorted  6mm beads,feathers,leather,leather string, hemp string,Sari Silk Ribbon

For this project I really used a lot of things I had around my art studio. So investigate your stash and see what you might have lying around that would be a perfect compliment to creating your own "StoryTelling Stick".

1) Sand the rough edges on your pieces of wood to create that vintage/worn look. Drill a small hole about 1" for the bottom from the front to back.

2) Paint your sticks, I used a turquoise and a deep orange for the main color.

3) Distress you sticks with  the Distress Stain in a mahogany color for that distressed/vintage look

4) Glue on a leather piece that is random in shape to go several times around the stick in the middle. ( I had some spare pieces that were embossed from another project that I used)


5) Using your tribal stamps  and ink pad ,start stamping where you  have open space on your sticks. Mine shapes represent the mountains and the forest ( pine trees)
6) Wrap the sticks with more ribbon,hemp or leather strings and tying around the  middle of the stick.


7)Start embellishing with the beads, gemstones and  feathers as I have above.

8) Add the tassels at the bottom of the sticks where you have drilled a small hole.


And there you have a wonderful creative StoryTelling Stick!

~Happy Creating~
Sherri