Showing posts with label vintage. Show all posts

Tuesday, February 21, 2017

"Vintage Treasures"~ Design Team Project for Proxxon Tools by Sherri Welser

 "Vintage Treasures"

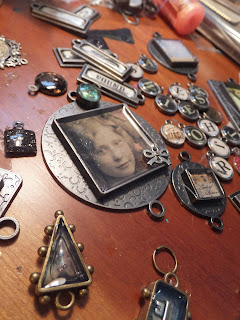
Embellish your Vintage family photos and show them off with some fun adornments and Proxxon's Drill Press! I absolutely love all things vintage / jewelry and when I saw these beautiful cabinet cards in an antique store I knew I had to find a way to honor them and bring them back to "life".
Below I have included the supplies and instructions for creating your very own Vintage Treasure!

~Supplies~
4 x 6 Vintage Cabinet Card ( these are the heavy card stock mounted photos)
Metal ,glass bead,charms and trinkets
Flat circular metal pieces for the outsides of the holes,buttons ect
chain
Epoxy resin ,vintage ephemera, bezels  ect if you would like to create your own bezels
Weldbond Glue
Jump rings
Metal connectors for hanging
 Vintage style Paper flower


 1) Gather all your trinkets and charms and decide where you would like them to fall on the chains. 


2)Cut your chain to desired length and cut at different intervals to create visual interest. 4 lengths in all
3) Mark where you would like the holes to be at the bottom of the photo and drill holes using the Drill press.  The drill press works well because of the stiffness of the card stock.
4) Take the circular metal pieces and place on top of the holes making sure the hole you just made and the hole in the metal line up. Glue metal pieces on using the Weldbond.

5) Attach jump rings to  the holes in the bottom of the photo here and to connect the chain where you have a break adding in the embellishments. This way you can connect the items together to hang down.


6) Add the charms, bezels and fun items on the chains having them fall at different lengths.
**To create your own bezel it is very easy by using a blank bezel , measuring paper ephemera to fit inside the bezel, gluing that down and then adding the epoxy resin over and let cure about 24 hrs


7) Using the metal connectors glue onto the top  of each corner of the photo with the ring end up.
8) Using a jump ring on each side attach the beaded chain to create a "hanger"
9) Attach a paper flower in the middle for added visual interest with the Weldbond Glue


I hope you have enjoyed this fun and creative way to add new life to old Vintage Photos!

Tuesday, April 26, 2016

~Vintage Embellishing~ Proxxon DT Project by Sherri Welser

~Vintage Embellishing~

"Adorn your Special Projects"

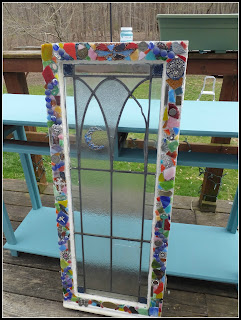
Even before it was a "Thing" I was perusing garage and estate sales looking for fun items to reinvent! I would find all kinds of tables and do the faux marble tops, a church pew was placed in the garden for setting plants on,old bicycles with the metal baskets were planted with flowers and they became unique focals in the flower garden. I have always loved finding these treasures and turning them into  Garden Art! Last fall I found an old church window with beautiful lines and even though some of the glass was broken I had a vision! Recently I found both a long wooden table and an old  wooden sewing machine table( both inexpensive finds at my local ReStore) with the beautiful metal work on it and the word "Singer" across the bottom~ these all are on my radar now to make beautiful again and here you will see several of those items come to life! The church window is finished with beautiful embellishments, words of inspiration,  charms, stained glass, glass beads ,jewels and trinkets of special meaning. In this week's part 1 of 2 posts, I will show you how I prepared the wooden table with fun examples of embellishing. Next time I will show you how I go about embellishing the table itself. This table will be put outside my art studio and used as a serving buffet at the fire pit area. Extra care will be taken also to prep it for outside use. For Part one I have included the supplies below.

~Supplies~
Wooden table of any size
Chalk Paint- ( I used Waverly in Agave)
Chalk Paint natural bristle brush

I began by painting the table with the chalk paint and using the round natural bristle chalk paint brush. I provides a nice even coat when brushing on.


Because I want the look to be "distressed" I am not concerned too much about "perfect" application of the paint. I just want to get a nice coat of paint on and let dry.

Once fully dry, using the Proxxon sander with a medium coarse grit sanding pad I start to "distress" the edges of the table to give  it that worn and aged look.


Now that the table is prepared for the creative part I will share with you some embellishing ideas below!


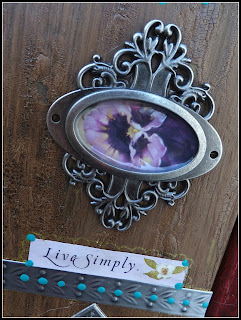
I use a lot of unique beads, jewelry findings, metal charms, inspirational charms, stained glass,and fun odds and ends to create the mosaic type feature that I am going for to adorn these vintage items.


So get your table ready and next time we will have so much fun embellishing the table top with all of these fun and unique items for a beautiful one of a kind piece!! See you next time!

Tuesday, November 24, 2015

"Find Your Happy Place" Vintage Wooden Houses~ Proxxon Design Team Project


"Find Your Happy Place"

Creating with PROXXON Tools


I Love to work with wood and making little Vintage houses is so much fun! For this project I used the PROXXON Scroll saw and Delta Sander to create these lovely little houses. The supplies I used are listed below

Supplies
 5 Random sizes of 2 x4 
(the sizes I used were from 6" to 12" tall- 4 houses and the base)
Crackle Paint ( I used Tim Holtz Distressed Crackle Paint)
Antique Glaze
Glue Gun
Glossy Accents
Assorted pieces of metal and paper ephemera,trinkets, charms and small doorknobs, anything that you feel would be a fun addition to your houses!
Acrylic paint
Gold Gel Pen
4 large Screws
Cooper wire for beading on the roof

1) I began with finding some random sizes of lumber.. 2x4s and some small scraps of thinner wood for the roofs. I cut the 2x4s
 ( with the scroll saw) into misc heights and sanded ( using the Delta sander)  the rough edges.. but still left some rough patches  to to give the appearance of weathered wood. I then cut the smaller pieces of wood into several triangular pieces for the roofs.


2)I wanted the look of old worn wood so I then painted the 2 x 4s that would be the houses with the crackle paint.

3)Here you can see the pieces all painted with an antiquing medium finish.
4)I set all the pieces in front of me with all the fun items to get an idea of how I wanted to design the houses.I used the glue gun to adhere most of the items to the houses.


5)I used the glossy accents to fill in some of the metal trinkets after adding vintage papers. I also used the gold gel pen to add doodles.

6)The final step is to screw the 4 houses to the bottom base piece.
 I had so much fun decorating these sweet little houses with all sorts of metal trinkets,paper ephemera and inspirational words!

Here you can see why it is called "Find Your Happy Place"


Here I thought it would be fun to use a funky wine cork for the chimney!


  Here I added some copper wire and beads on top to add an interesting element and bring your eye upwards.
I love this little bird in flight and adding that fun whimsy!

PROXXON makes creating these interesting and fun creations so much easier with their wonderful tools! 
Happy Creating!
Sherri


Tuesday, November 10, 2015

Proxxon Design Team~Free Spirit~ Gypsy Style Buffet

~Free Spirit~
Gypsy Style Buffet


I just love Bohemian and Gypsy inspired pieces as I am a total "free spirit" and just the uniqueness that the Gypsy style brings! I am so happy to be a new Design Team member for Proxxon tools as I love creating all types of projects with wood . I was in the middle of redoing this vintage style buffet  when my order arrived from Proxxon. I chose to use the Delta sander to be able to quickly sand down the areas to give it a worn look.


 I just love the Delta sander and was surprised that it was so well made and felt so comfortable in my hand. I used it to sand down the piece around all the edges (using a medium grit sand paper) and the top of the buffet and the drawers. It took no time at all and it was wonderful to sand these areas with such ease! The paint base is chalk paint ( Folk Art)  in the color "Savannah" . It was a blue color previously and I thought it would be fun to have some of that peek through to add more of a "story" to the piece.


  I used a large wall stencil to decorate the top and sides as well as the drawer fronts. I used a plum color acrylic paint. 


I  then decided to add gold acrylic dots to adorn the pattern


 The goal for this piece was to have an antique finish on it and I used an antique wax medium. It made the piece a bit darker but I love the fact it looks like it is an old well loved piece!


Being able to use the Delta sander for part of this project made that tedious part of the task so much easier and faster! I love the way you can easily attach the sandpaper triangles with the velcro base! I was pleasantly surprised at how well the velcro sandpaper triangle held on!! It didn't budge at all while sanding!
 I Hope you all have some fun creating a little Vintage Gypsy piece for yourself!
Happy Creating!!
 You can find a full selction of PROXXON tools here