Showing posts with label WildHeart art. Show all posts

Tuesday, July 4, 2017

"Fairie Door" by WildHeart Art for Proxxon Design Team


"Fairie Door"

by WildHeart Art 
Proxxon Design Team


How fun it was to create this sweet little Fairie door~ perfect for a secret little place in the garden using  Proxxon Power Carver MSG.

~Supplies~

Wooden board or plaque any size
Acrylic Paints
Weld Bond Glue
Metal embellishments
Spray Varnish

 1)Start by drawing out your door design

 2) Using the Power Carver Tool carve out the lines

 3) Paint  the door using acrylic paints

 4) Add metal embellishments  using the Weld Bond Glue to create that Fairie look
5) When finished seal with a spray varnish


Tuesday, February 21, 2017

"Vintage Treasures"~ Design Team Project for Proxxon Tools by Sherri Welser

 "Vintage Treasures"

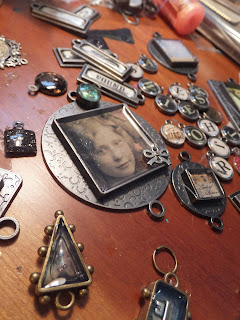
Embellish your Vintage family photos and show them off with some fun adornments and Proxxon's Drill Press! I absolutely love all things vintage / jewelry and when I saw these beautiful cabinet cards in an antique store I knew I had to find a way to honor them and bring them back to "life".
Below I have included the supplies and instructions for creating your very own Vintage Treasure!

~Supplies~
4 x 6 Vintage Cabinet Card ( these are the heavy card stock mounted photos)
Metal ,glass bead,charms and trinkets
Flat circular metal pieces for the outsides of the holes,buttons ect
chain
Epoxy resin ,vintage ephemera, bezels  ect if you would like to create your own bezels
Weldbond Glue
Jump rings
Metal connectors for hanging
 Vintage style Paper flower


 1) Gather all your trinkets and charms and decide where you would like them to fall on the chains. 


2)Cut your chain to desired length and cut at different intervals to create visual interest. 4 lengths in all
3) Mark where you would like the holes to be at the bottom of the photo and drill holes using the Drill press.  The drill press works well because of the stiffness of the card stock.
4) Take the circular metal pieces and place on top of the holes making sure the hole you just made and the hole in the metal line up. Glue metal pieces on using the Weldbond.

5) Attach jump rings to  the holes in the bottom of the photo here and to connect the chain where you have a break adding in the embellishments. This way you can connect the items together to hang down.


6) Add the charms, bezels and fun items on the chains having them fall at different lengths.
**To create your own bezel it is very easy by using a blank bezel , measuring paper ephemera to fit inside the bezel, gluing that down and then adding the epoxy resin over and let cure about 24 hrs


7) Using the metal connectors glue onto the top  of each corner of the photo with the ring end up.
8) Using a jump ring on each side attach the beaded chain to create a "hanger"
9) Attach a paper flower in the middle for added visual interest with the Weldbond Glue


I hope you have enjoyed this fun and creative way to add new life to old Vintage Photos!

Wednesday, February 1, 2017

Add Some Inspiration to Your Mixed Media Artwork by Sherri Welser

Adding Inspiration to Your Mixed Media Artwork


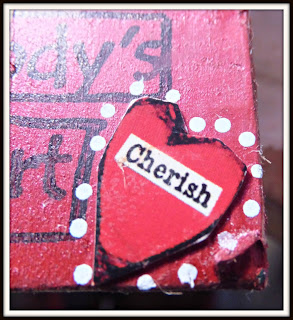
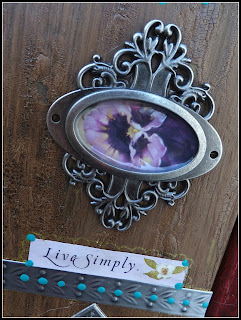
Using sweet little inspirational words in your mixed media artwork always brings a smile to those who see it! Here I used the Proxxon Bench Drill Press  to create the holes on either side of the wooden inspirational wooden plaques. Details  and supply list below.

~Supplies~
Mixed media canvas (I did 2 at the same time ~ 12 x 4)
Acrylic paints-colors
Acrylic paints-white
Ink Sprays
Wooden inspirational words
Copper brads
Weld Bond Glue
Paint brush
Stencils
Gel pens

1) Start by using the acrylic colors and apply paints randomly with the brush filling in all the spaces on the canvas.


2) Using the stencils lay them down on the canvas and spray the inks through them to create a fun whimsical background

3) I then drew a dragonfly onto the canvas

4) Using the white acrylic paint cover over outside of the drawn dragonfly.
5) Using the Proxxon Bench drill press, drill small holes on either side of the wooden word being careful to avoid the lettering.

6) I used 2 copper brads for either side where the holes are and put the brads through the holes and spread out the tabs on the back side.

7) Using Weld Bond glue I then attached the wooden plaques onto the canvas in the middle of the dragonfly's tail. I applied a weight  onto the plaque as well to make sure of a good  seal.
You can add some finishing touches with gel pen doodles


You now have completed an inspirational mixed media piece which was easy and carefree to create!
ENJOY!


Tuesday, February 2, 2016

~Hello Valentine~ NEW DT Project for Proxxon by Sherri Welser

~Hello Valentine~


What fun this sweet paper doll Valentine Girl was to create! Wood is a beautiful base for so many fun and unique projects and incorporating it with these beautiful vintage paper dolls by ArtChix Studio was a blast! Proxxon  tools has made working with wood so much easier~ the tools are so well made and easy to operate! For this project I used a scrap piece of wood that I sanded using the  Delta Sander OZI/E. I love the sander and use it often for my woodworking projects!

~Supplies~

Rectangle piece of scrap wood ( Mine is about 2 1/2 x 9")
Acrylic Paint in red
Inspirational stamp saying and  LOVE stamp
 Archival Ink pad-black and Sepia
Metal key
Weldbond glue
Mod Podge
Piece of lace ( about 5 " long)
Canvas  oval tag
Misc charms to hand off of the lace tie
White Sharpie Marker


1)Cut, sand and paint your rectangle  wooden block and let dry.
2) Cut out the paper doll parts and glue on the wood with the mod podge. Adding different hats , crowns, wings etc is also fun! 

3)Using the Sepia Ink pad, create a distressed look on the wood and edges of paper. 
4)Stamp the inspirational phrase  at the bottom with the black ink .
5) Attach the charms and the canvas tag to the lace.


6) Stamp the word LOVE on the tag.
7) Add Lace through the key and  use the Weldbond glue to attach to the wooden rectangle at the top.


8) Using the white Sharpie Marker add dots all around the edges of the girl.

I hope you have enjoyed this easy but very creative project using some Valentine Inspiration!
~In Love & Light~
Sherri


Tuesday, January 5, 2016

New Design Team Project for Proxxon ~ StoryTelling Sticks~


" StoryTelling Sticks" Aka "The Talking  Stick"

I am fascinated by Native American culture and ways, so I decided it would be a wonderful project to create these StoryTelling Sticks or as the Native Americans say " Talking Sticks". There is a rich history in the use of these Talking Sticks" at community gatherings. The person who would be speaking would be given the "Talking Stick"  to speak his "truth" and not to be interrupted by others. Only the person holding the Talking Stick would be allowed to speak. There is much meaning behind the creation of the Talking Stick as well. Everything used to created the stick has meaning from the wood used, to the bead colors, paint colors, fur, gemstones etc. And although a Talking Stick can be used to speak one's voice, it can also be used by a Storyteller and to document the stories told . Charms  with ribbons and  a connection to the story being told can be attached to the end of the stick with ribbon, this way each story is documented. More information can be found by doing a search on the internet and I also have gathered some information below for you on Talking Stick Circles.

*Talking Stick Circle Guidelines (David Boje & Joe Gladstone, 2008) 
1. We sit in circles, not pyramids.
2. The person with the Talking Stick is the designated story-talker.
3. Pass the Talking Stick clockwise. Start with the person sitting in the East-most position, then go to the right. In Talking Stick going clockwise is an earth-process. Otherwise the magic is undone.
4. Persons without the Talking Stick, please listen, write notes, and notice the story. Focus your listener attention on the storyteller with the Talking Stick. Let your mind recall stories as the teller tells stories.
5. Try to limit interruptions. A person with the Talking Stick can pass it to someone for a clarification, question, or amplification on a point, then call the stick back to finish their story.
6. There will be multiple rounds of Talking Stick Story Circles. Each time there is a question. At the end of a round of story-sharing, story-noticing (story-listening), a spokes-person repeats the main themes, issues, resolutions, and proposals that came up. So be sure to take notes.
7. The output of Talking Stick Circle is ideas, proposals, and stories of a vitalized community. Designate people to listen, to observe, and to provide a report out of the collective story that is emerging in the Circle.
8. The point is to create a collective story, one that is faithful to everyone's living stories, to unify in community.

This was such a wonderful project using  art,intention, purpose and meaning.I hope you enjoy creating them as much as I did!

~Supplies~

Wood pieces about 3 x 11
Drill for holes
Acrylic Paint
Distress Stain ( I used Tim Holtz)
Tribal stamps ( I made mine)
Stamp pad
Glue Gun
Ready made suede tassels ( or you can make one)
Gemstones
Carved  gemstone feathers or other shapes
Iron metal focal
 Jewelry Wire for stringing the beads
Assorted  6mm beads,feathers,leather,leather string, hemp string,Sari Silk Ribbon

For this project I really used a lot of things I had around my art studio. So investigate your stash and see what you might have lying around that would be a perfect compliment to creating your own "StoryTelling Stick".

1) Sand the rough edges on your pieces of wood to create that vintage/worn look. Drill a small hole about 1" for the bottom from the front to back.

2) Paint your sticks, I used a turquoise and a deep orange for the main color.

3) Distress you sticks with  the Distress Stain in a mahogany color for that distressed/vintage look

4) Glue on a leather piece that is random in shape to go several times around the stick in the middle. ( I had some spare pieces that were embossed from another project that I used)


5) Using your tribal stamps  and ink pad ,start stamping where you  have open space on your sticks. Mine shapes represent the mountains and the forest ( pine trees)
6) Wrap the sticks with more ribbon,hemp or leather strings and tying around the  middle of the stick.


7)Start embellishing with the beads, gemstones and  feathers as I have above.

8) Add the tassels at the bottom of the sticks where you have drilled a small hole.


And there you have a wonderful creative StoryTelling Stick!

~Happy Creating~
Sherri


Tuesday, November 24, 2015

"Find Your Happy Place" Vintage Wooden Houses~ Proxxon Design Team Project


"Find Your Happy Place"

Creating with PROXXON Tools


I Love to work with wood and making little Vintage houses is so much fun! For this project I used the PROXXON Scroll saw and Delta Sander to create these lovely little houses. The supplies I used are listed below

Supplies
 5 Random sizes of 2 x4 
(the sizes I used were from 6" to 12" tall- 4 houses and the base)
Crackle Paint ( I used Tim Holtz Distressed Crackle Paint)
Antique Glaze
Glue Gun
Glossy Accents
Assorted pieces of metal and paper ephemera,trinkets, charms and small doorknobs, anything that you feel would be a fun addition to your houses!
Acrylic paint
Gold Gel Pen
4 large Screws
Cooper wire for beading on the roof

1) I began with finding some random sizes of lumber.. 2x4s and some small scraps of thinner wood for the roofs. I cut the 2x4s
 ( with the scroll saw) into misc heights and sanded ( using the Delta sander)  the rough edges.. but still left some rough patches  to to give the appearance of weathered wood. I then cut the smaller pieces of wood into several triangular pieces for the roofs.


2)I wanted the look of old worn wood so I then painted the 2 x 4s that would be the houses with the crackle paint.

3)Here you can see the pieces all painted with an antiquing medium finish.
4)I set all the pieces in front of me with all the fun items to get an idea of how I wanted to design the houses.I used the glue gun to adhere most of the items to the houses.


5)I used the glossy accents to fill in some of the metal trinkets after adding vintage papers. I also used the gold gel pen to add doodles.

6)The final step is to screw the 4 houses to the bottom base piece.
 I had so much fun decorating these sweet little houses with all sorts of metal trinkets,paper ephemera and inspirational words!

Here you can see why it is called "Find Your Happy Place"


Here I thought it would be fun to use a funky wine cork for the chimney!


  Here I added some copper wire and beads on top to add an interesting element and bring your eye upwards.
I love this little bird in flight and adding that fun whimsy!

PROXXON makes creating these interesting and fun creations so much easier with their wonderful tools! 
Happy Creating!
Sherri