Tuesday, November 10, 2015

Proxxon Design Team~Free Spirit~ Gypsy Style Buffet

~Free Spirit~
Gypsy Style Buffet


I just love Bohemian and Gypsy inspired pieces as I am a total "free spirit" and just the uniqueness that the Gypsy style brings! I am so happy to be a new Design Team member for Proxxon tools as I love creating all types of projects with wood . I was in the middle of redoing this vintage style buffet  when my order arrived from Proxxon. I chose to use the Delta sander to be able to quickly sand down the areas to give it a worn look.


 I just love the Delta sander and was surprised that it was so well made and felt so comfortable in my hand. I used it to sand down the piece around all the edges (using a medium grit sand paper) and the top of the buffet and the drawers. It took no time at all and it was wonderful to sand these areas with such ease! The paint base is chalk paint ( Folk Art)  in the color "Savannah" . It was a blue color previously and I thought it would be fun to have some of that peek through to add more of a "story" to the piece.


  I used a large wall stencil to decorate the top and sides as well as the drawer fronts. I used a plum color acrylic paint. 


I  then decided to add gold acrylic dots to adorn the pattern


 The goal for this piece was to have an antique finish on it and I used an antique wax medium. It made the piece a bit darker but I love the fact it looks like it is an old well loved piece!


Being able to use the Delta sander for part of this project made that tedious part of the task so much easier and faster! I love the way you can easily attach the sandpaper triangles with the velcro base! I was pleasantly surprised at how well the velcro sandpaper triangle held on!! It didn't budge at all while sanding!
 I Hope you all have some fun creating a little Vintage Gypsy piece for yourself!
Happy Creating!!
 You can find a full selction of PROXXON tools here

Friday, November 6, 2015

Chrismoose


A Tiny Tool Time "Chrismoose"

Hello everyone, Barbara Moore here and my project to share with you today is a cute little "Chrismoose" ornament. I have been making a lot of ornaments out of mini gourds in the past week. When I saw this particular mini gourd shape, the "Chrismoose" idea was born.

The supplies used used in this ornament were:
 1 mini gourd ornament
 1 small piece of masonite 1/8" thick
 wire 
 paint
 small piece of fabric ( I used a tiny piece of fleece)
 med. sized pom pom
 2 jingle bells
 1 snowflake brad
  paint brushes
 glue

Tools used:
Proxxon Delta Sander  OZI/E
HSS Cutting blade for OZI/E ,  2 1/2"
Proxxon Jig Saw STS 12/E (This jigsaw has a rounded foot for curved surfaces)
Foot Switch FS (Is a perfect addition to that jigsaw so that you can operate it without having to turn loose of what you have in both hands lol) 

I started out with a plain mini bottle gourd which I painted brown:
I then drew a pattern of my moose antlers and copied it onto the masonite and cut it out with the jigsaw:
(That was just a pose for the camera)
I then took the sanding part off of the sander and attached the HSS Cutting Blade. This is an oscillating blade and it was so easy to work with! I used it to cut a slot in the top of the gourd:

After cutting the slot for the antlers, I attached the antlers:


I then painted the antlers brown and drilled four very tiny holes in the antlers in strategic spots to attach the jingle bells, snowflake and hook. I painted the face, attached the pompom for a nose and cut a small piece of fleece and tied it around his neck for a scarf.

Now, isn't this just the cutest little Chrismoose that you've ever seen? 
I really love using these new tools and can officially say that I totally endorse them. I'll be showing many more gourd projects created with them.

Thank you so much for taking the time to read this post!
Barbara Moore
http://barbara-moorewhimsies.blogspot.com
 

Falling Leaves Candle Holders

Good morning everyone, Steph Ackerman here with my first post as a member of the Proxxon Tiny Tool Design Team.  I am thrilled to be working with Proxxon's tools and decided to create some Fall candle holders.


Supplies:
Proxxon Tools:  Hotwire Cutter Thermocut 115/E
Foam:  Smoothfoam
Inks:  ColorBox
Tea Light Candles

I must say that I have never used a styrofoam cutter before so I was intrigued to see the Proxxon Hotwire Cutter in action.  The Hotwire Cutter has a base of approximately 15"x11", was compactly packaged and fairly easy to assemble.  The wire heats up quickly and there is a learning curve for determining the correct temperature setting which is easily controlled by the dials on the base.


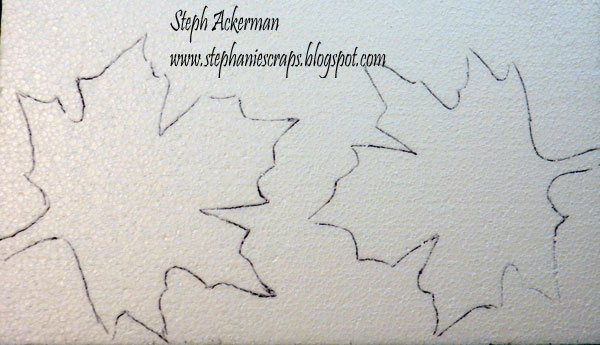
I began by outlining maple leaf images directly onto a sheet of Smoothfoam, drawing around them with a black marker (so I could see where I was cutting).


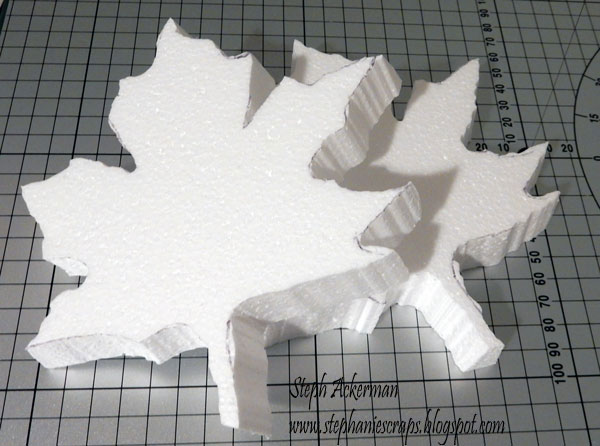
Using the Hotwire Cutter, I cut the Smoothfoam sheet in half so I could work on one leaf at a time.  Then I carefully cut around the leaves.  As the Hotwire Cutter is new to me, I worked small areas at a time, testing the heat settings as I went to find the setting that was appropriate for my project.
 
 
 And this is the result.  While the cuts may not be perfect, I believe they reflect how fall leaves look.  And since I intended to ink over the Smoothfoam, I didn't care that the black marker showed in some spots.
 
 
Using an assortment of ColorBox inks, I inked the leaves, overlapping the colors to get the desired effect.
 
 
These leaves are the perfect base for holding candles.  And they look lovely for this time of  year.


Thanks for stopping by today. 

Steph


Wednesday, November 4, 2015

Thanksgiving Turkey Framed Decor


Hi everyone! Tammy Santana here from the creative lifestyle blog, www.TammySantana.com, with my take on a fun home decor project that is perfect for a gift or just to showcase on an entry table or mantle.
Supplies I used:
Metallic copper and gold paint
Ribbon
Zip Dry adhesive
Dollar Store Frame
Straight Pin
Red glitter cardstock
Needle and thread

How I made it:
Cut your turkey shape out of the Smoothfoam and freehand the squiggle cuts inside the shape. Separate the pieces a little bit to create the raised effect.
 
 Add a little Zip Dry adhesive to the back of the piece to keep the pieces separated and paint metallic copper. Drybrush some metallic gold on the top of the piece sticking out. Add pieces of red glitter cardstock and a black straight pin head for the eye.

 Cut and heat seal the ribbon with the Proxxon Hot Wire Cutter and glue to the back of the turkey body.
 Add some fabric adhesive tape to the ribbon
 Adhere the finished turkey to the outside of the frame. Add some glitter cardstock to the inside of the frame and attach the back onto the frame.

 And that's it...easy peezy!

xoxo Tammy

Monday, November 2, 2015

Business Card Holder

My first project for the Proxxon Tiny Tools design team is a business card holder.

My inspiration came from this free pattern. But, the dragonfly is too advanced for my cutting abilities. So, I redesigned the pattern in Make-the-Cut. At the end of this post I've included both an SVG and a PDF file of my redesign. The two pieces slide into matching deep notches to assemble the holder. 

The first step was to attach the pattern to my wood. I started by covering the surface with painter's tape. Next, I sprayed the back of the pattern with spray adhesive, and put that on top of the painter's tape. The spray adhesive holds the pattern in place, and the painter's tape makes removing it a breeze.
Wood with painter's tape applied, ready for the pattern
Pattern adhered to the wood on top of the painter's tape

Now, the fun begins!! Here's a picture of my initial cut on my Proxxon scroll saw.

After I completed the initial exterior cuts, I drilled pilot holes to enable cutting the interior spaces. When cutting interior spaces, the saw blade is passed through the pilot hole, and then the cutting is completed.

Here are the cut pieces, assembled, and waiting on my work table for a coat of paint.

I used two coats of a black-green acrylic paint for the base color. When it was thoroughly dry, I dry brushed a gold metallic acrylic paint for highlights.


Free SVG pattern for business card holder
Free PDF pattern for business card holder

Carole