Wednesday, November 7, 2018

Christmas Ornaments by Steph

Hi everyone, Steph Ackerman here today with a set of Christmas ornaments.


Supplies:
Proxxon Scroll Saw
Proxxon Delta Sander
Rinea Foiled Paper
Spellbinders Dies

Who doesn't love decorating for Christmas?  Using assorted tools, you can create an amazing assortment of ornaments.


Draw the pattern on the wood, then cut the ornaments using the Scroll Saw.


Punch holes in the tops using the Drill Press so you can hang the ornaments once decorated.


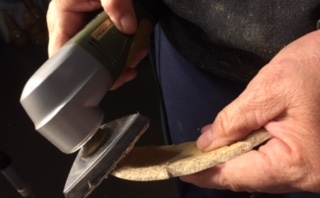
Sand each ornament with the Delta Sander.


Wanting different colored ornaments, I painted each with Folk Art Color Shift paints. Remember to paint both sides of the ornaments.


Once they dried, I cut Rinea Silver Starstruck Foil to fit the top of each.


Next, I decorated each ornament by die cutting several different colors of Rinea Foils.  Ribbon was tied to each ornament so they can hang wherever you want them.

Thanks for stopping by.


Sunday, November 4, 2018

How to Make Nativity Scene Blocks

Making these nativity scene blocks is a great way to get to know your Proxxon tools. They can be made of scrap wood, MDF, plywood, or particle board. The entire set includes two shepards, three wise men, Mary, Joseph, Baby Jesus, the stable, camel, lamb, sheep, donkey, cow, star, and angel.

Supplies and Equipment for the Nativity Scene Blocks

  1. Measure and mark the dimensions of the individual blocks on your wood.
  2. Cut the pieces using either the table saw or bandsaw.
  3. Sand any rough edges with the disc sander.
  4. Paint the blocks with your choice of colors using Folk Art Milk Paints.
  5. Cut stencils using the provided patterns. I cut mine from vinyl, but acetate or cardstock would substitute. When the paint is thoroughly dry, position the stencils on the blocks.
  6. Use a sponge dauber to apply the FolkArt Brushed Metal color of you choice.
  7. Side note: It's great to involve kids in the painting steps.
  8. When the Brushed Metal paint is thoroughly dry, carefully remove the stencils.

Carole

Friday, November 2, 2018

How to make a gourd turkey centerpiece


Hi everybody!  October has come and gone.  The goblins and witches are back wherever shadowy place they came from, and now it is time for the turkeys to come out!  Not talkin about me, but about the real turkeys, err.. or at least some turkey look-a-likes for Thanksgiving.   Today I want to show you how to make a turkey from a gourd and some gourd scraps using some easy to use proxxon tools, a little putty, and some paint from plaid.   Oh and just a little glitter for bling!


Supplies
1 bottle neck gourd plus gourd scraps
small piece of thin leather or felt
Glitter
school glue
gorilla glue
Apoxy sculpt
spray sealer  (I used krylon crystal clear)

Equipment


Here is the gourd I chose to be my turkey.  I like the long neck and how the "head" tips back just a little bit.  Even before I get started, I can see a turkey in this gourd.


The next thing I need is a piece of a gourd I can use to make his tail feathers.   The bottom of a different gourd will work perfect     I could use a scrap piece of gourd here but I am going to cut the bottom off another gourd using the proxxon mini jigsaw.   I want to start with a circle so I use a bowl to mark my line then cut it with the mini jigsaw.  


I use the bottom for his tail feathers.   I am going to draw, then cut out a really simple pattern.


Next I cut the wings from a different gourd scrap.  (pay attention to the curve of the gourd so your wings will lay properly)   The little proxxon mini jigsaw makes gourd cutting super easy.  Without this tool I don't know how I would ever be able to make these delicate cuts!


Time to sand all the edges using the Proxxon OZI/E delta sander.  Round over all the edges on the wings   Also the inside part of the gourd is rough but this is easily smoothed with sanding.  This will make for easy painting later.


Time to Paint

 Using Plaid paints I squeezed a little of my chosen colors onto a palate then dipped a sponge into the 2 browns and orange which I had placed side by side.  then I just sponged the paint all over the gourd, letting it make a mottled "feathery" look.   I painted the tail feathers next. Then I used school glue in a zigzag pattern and added black glitter.   This was just how I chose to do it.  Your turkey---your design!


I used apoxy sculpt to form a beak and painted on some eyes.  I will paint the beak after It dries overnight.

 When I finished painting, I sprayed all the surfaces with krylon crystal clear to seal it.  This also helps to keep the glitter from coming off.   I used gorilla glue to glue on the tail and the wings.


A piece of leather for the waddle and he? she?   is All done!  


That was fun.  Truth be told this was super easy.  This could be painted and decorated so many different ways. Big and little turkeys everywhere.    I hope you give it a try, let the kids paint it.

Thanks so much for visiting.   Thanks Proxxon, and  Plaid  for the great products.
Everyone have a safe and happy Thanksgiving!!   Carol


Saturday, October 27, 2018

Another Decor Project that you can make yourself!


I have really been in the gourd crafting mood since I got home from this past Gourd Festival which we went to in Alabama.  I found this special gourd that just spoke to me and I had to bring it home.

The Supplies needed for this project are: 

Alcohol Inks
Q-Tips
Small pieces of t-shirt fabric
Wood burner and Pen
Small wooden stand
Small piece of Cholla cactus
E 6000 glue
Kamar Varnish


I started out with a raw gourd that had been cleaned on the outside.


I drew a line that I wanted to cut out. I used my Proxxon Professional Rotary Tool to drill a pilot hole in the gourd and used my Proxxon Jig Saw to cut around the line.


This is what things looked like when I opened it up. Yuck, gourd guts as I like to call it. I was lucky and the guts of this gourd were pretty easy to clean out. That's the part of working on a gourd that I hate, the cleaning.


Here's a good picture of the insides after cleaning.


I got a little ahead of myself with the prior picture but once the gourd was opened up and cleaned I drew oak leaves all around the gourd and wood burned them. I then used this filigree bur to cut around them.


I used this sanding burr that I got from Proxxon Tools to sand the edge all around the top of the gourd. I then used the alcohol inks to color the leaves, the body of the gourd and also the base. I used Plaid paint to paint the inside of the gourd and also around the top. 


I used my Proxxon Band Saw to cut my piece of cholla cactus down to size. Then I used my E 6000 to glue the cholla cactus to the gourd and the cholla cactus to the base.

Here's the final product! I love Fall colors and Fall leaves and I think they came together very well on this piece. I hope you like it as much as I do. Take a look at all the tiny tools that www.proxxon.com has for you to purchase and also www.plaidonline.com and the many products that Plaid has to offer also. 


Barbara

Friday, October 19, 2018

How to make an extension cord organizer


Hi, and welcome back.   Carol here with an organizing idea for you.  I don't know about you but I have a zillion extension cords.  (and I need them all.  I do...but not all over the place... if you know what I mean).    Anyhow, perusing the internet I saw a nifty idea someone had posted with hooks and a pivot and.... Well there wasn't any instruction with it, so today I am going to take it upon myself to make one of those, but with my own tweeks and show you how to do it.  It is going to be really easy..  The hardest part for me is going to be finding that little bit of wall space I need to hang it.
  Ok let's get going.

Supplies:

1" x 6" x 36" pine board
1" x 2" x 36" pine board
6 bicycle hooks
1 1/2" screws (12)
4" lag bolt
wood glue

Equipment:

Drill
Drill bits
Screwdriver


OK, here's the cutting plan.  Each little square represents 1"  Shaded areas are waste.


I used the Kapro measure mate 313. to do my measuring.  I like how it sits flat on the work surface and the measuring part lies right on the work surface.  In the picture below I am determining the center point of the width of my wood piece while planning my project.  The centering side of the ruler comes in very handy.  See how it measures 2 3/4 on each edge of the wood. Zero marks the perfect center.


I use the proxxon mini bandsaw to make my cuts.  No set up required on this tool.  Just follow the lines.  Easy and fast!


The cutting was easy and now I have all my pieces.  Next step is to sandwich the middle piece in between the two sides.   I used wood glue and clamps to secure it.  Later I will strengthen the bond with a few wood screws.


When this is dry I place the long piece in the hole left by the shortened middle piece.  Make sure the long bar has room to swing without hitting the middle.  This is important for later.  I clamped it there then drilled a pivot hole through the 3 pieces.


Long bar will be inserted in the gap  and the hole will be drilled where you 
currently see the lag bolt  The bar should swing freely when the bolt is through all 3 pieces.


On the long bar I first predrilled some holes then screwed in my hooks approximately 4 1/2" apart.  I did leave a larger space on the last one because I have a really long extension cord so it would have room, being so bulky.

Be careful not to put any hooks where it will interfere with the swing of the bar.  You need to be able to extend the bar straight out and also the bar should hang perpendicular to the hanger part.  

My next step was to attach it all to a board that I will be able to screw onto my wall.  I used a 12" long piece of the 1" pine.   I first glued it, then added some screws to strengthen the bond.  I also added a few screws to my holder to make it stronger as well.


Attach it to the wall.     See that tiny nail at the end of the holding piece?  That holds it horizontal while I load my cords.   


Now the cords are loaded, I take out the nail holding pin and lower my arm.  The cords are separated and will not get tangled.  They really take up much less space, sitting nicely against the wall, and I am neither walking on them or tripping over them.   I'm going to make a little one for the household cords, when I organize the pantry closet.  😚


What do you think?   I am thrilled that the cords are tamed! and... even better, I don't have to untangle them every time I need one.   It was fun and very easy to make!

Thank you all for stopping by.   Thanks Proxxon for having such neat and easy to use tools.  Thanks to Kapro for making measuring so much easier, and Thanks to Terri for letting us do this.

Till next time.   Be have fun and be creative    Carol