Sunday, March 31, 2024

How to Make the Perfect Mother's Day Plaque

 Honor mom with her own special plaque made using Proxxon MICROMOT tools.

Supplies and Equipment for making the MOM plaque:

Instructions:

  1. Print the plaque template.
  2. Mount the template on your wood blank. Cover one side of the blank with painter's tape. Mist the back side of the pattern with spray adhesive, and mount on the taped blank. The painter's tape makes removal of the pattern easy without leaving any sticky residue.

  3. Cut out the template using the bandsaw and scroll saw.


  4. Use the belt sander to sand the edges of the plaque.

  5. Finish as desired. I used FolkArt Home Decor Antique Wax.

  6. Present to mom to let her know how special she is.

Carole

Sunday, March 17, 2024

Creating Tiny Porch Posts Using Proxxon Tools


Hi everyone! Today I wanted to show you how I turned tiny porch posts on the Micro Woodturning Lathe. I'm still building one of my tiny houses and I thought this would be a nice addition instead of just a plain wooden dowel. Let me show you how I made them.

Supplies:

   Proxxon Micro Woodturning Lathe DB 250
   Proxxon Scroll Saw
   Proxxon Five Piece HSS Chisel Set
   Wooden Dowel
   Sand Paper


First, I determined the length of the posts and cut two pieces using the Proxxon scroll saw.  I added on an extra inch because I can't tell exactly how long they need to be until I put the base on the house. That won't be till I'm further along.  


The next thing was I needed to determine the center of each end of the dowels and mark them. My lathe came with a small tool you use to mark the centers.


Once I had the centers marked, I attached the dowl to the lathe and tightened it on. With a pencil I marked 2 lines where I wanted the turning or carving away the wood to be.


Using the chisel set, I chose the parting tool.  This chisel is flat but cut at an angle. Resting on the tool rest, I started to carve in the details.


I also used a piece of sandpaper against the wood to taper the dowel.  Then finishing up again with my parting tool.


I took the dowel off the lathe and attached the second dowel. I marked it again with a pencil so I could try and copy the first dowel.  I repeated the whole process.


Now I've got two porch posts that are finished and ready to be attached. I still have some work on the porch before I attach the base, so the posts will go on after that. Once I can tell exactly how long each post needs to be, I may turn a small detail at the bottom also.


Thanks for following along.  Till next time...
Colleen  :-)


Sunday, March 10, 2024

How To Cut Window Openings Using The Proxxon Scroll Saw


Hi Everyone!  As you may have already figured out from a few of my past pots, I have been building and selling tiny houses.  If I didn't have my Proxxon Tools, I don't think I'd be able to accomplish the things I'm now building.  I design all my own patterns. I thought maybe some people would be interested in seeing how i cut the window openings using the scroll saw.  Follow along with me and ill show you how I do it   :-)


Supplies:
   
   Proxxon 2 Speed Scroll Saw DS 460
   Proxxon Cordless Belt Sander
   1/2" wood  ( any thickness will work depending on your particular project)
   Drill and 1/4" drill bit


Using my own pattern, I draw the design on whatever thickness wood I'm using.  For this house I happened to be using 1/2" MDF.


Now that i have my pattern drawn, I cut it out using the Proxxon scroll saw.


Next, I determine where i want my windows placed.  I draw the shape of the windows on the wood.  In order to cut out the windows, you must drill a hole in the center of the window shape.  I always use a 1/4" drill bit in my drill.  Now I move the piece to the scroll saw and remove the blade. Drop the blade down through the hole and reattach the blade to the saw.


Now your blade is connected and ready to cut.


I've kind of got a system of how i cut to get perfect corners.  Get the blade over to one of the edges and saw to the corner.  then back up a tiny bit aur curve the blade to the next corner. Once you get all the way around the center blank mill be able to pop out. I just lift the piece up and it falls out.  Next, I turn the piece the opposite way and cut down to the other corner.  This does take quite a while to cut each window, but it works well.


Occasionally I may have to sand on the inside edge if there's any roughness, but my Proxxon Cordless Belt Sander cleans that right up.


This method will work when cutting out any shape in the middle of a piece of wood.  Thanks for following along with my little lesson.  Till next time...
                                                                      

                                                            Colleen  :-)


Sunday, March 3, 2024

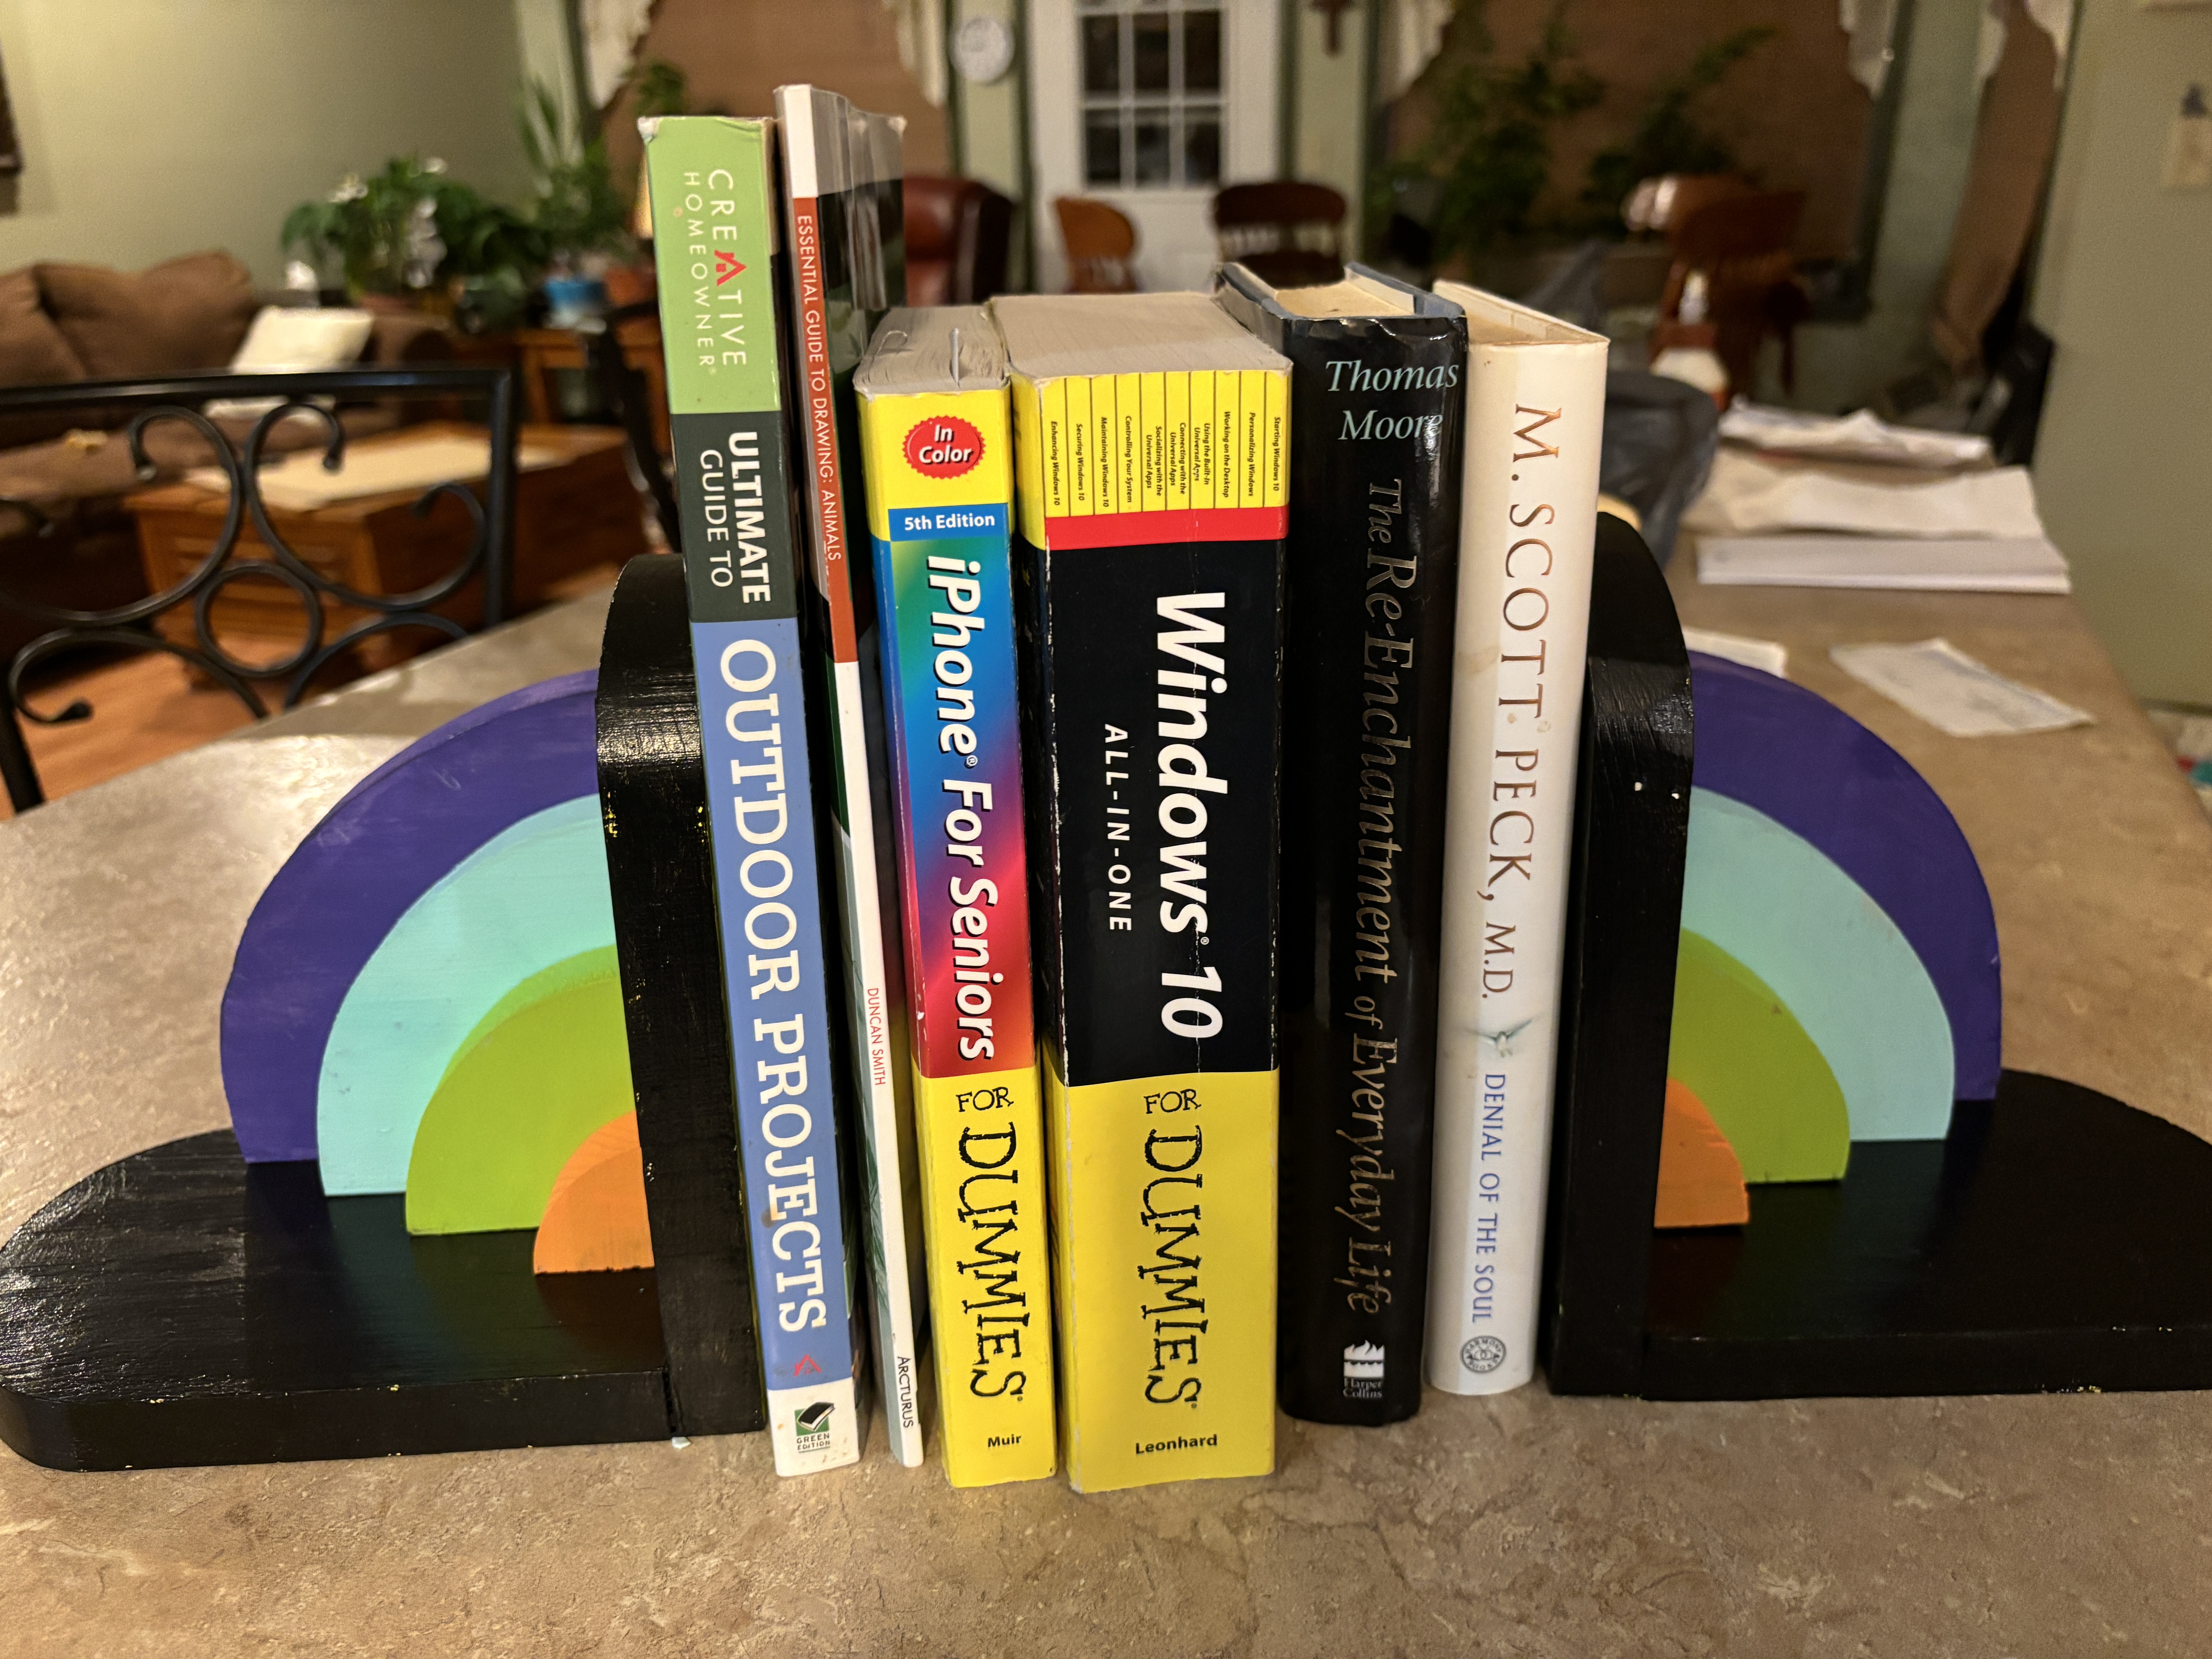
Easy to make bookends

 Hi everyone.  Hope this finds everyone well, and anxious and motivated for a new project. 

I just want to tell you that since it warmed up a little, I have been enjoying my workshop.  But, I didn't know what to make, I had dug out an old board that I knew would work for whatever project I decided on.  Flipping through an artists' journal gave me an idea, so now I will get busy and show you what I made so you can go out and make yourself 1 or 2. This would be great in a toddler's room to hold his colorful books.


I used just one board.  1 x 7 x 48  


First, I transferred my pattern onto my board Then, using my Proxxon mini bandsaw I cut  out all the pieces.  Note if you use the extra narrow band saw blade you can cut out these pieces very easily as it will take tight curves with ease.

After sanding real well, I used some carpenter's glue to glue the basic braces together.  Note:  The longer one is glued to the shorter one so that the sides and the base are of equal length.   When the glue dries I add some nails for added support.  I used the Proxxon cordless rotary tool to pre-drill my holes to avoid cracking the wood.  


Then I sand all the pieces well and proceed to painting. 


]\

Let that get good and dry then glue it up like a rainbow to the base and side pieces.  Drill and add the nails or screws for added support and you're done.  The bookends are heavy enough, so they don't slide.  

It was easy, wasn't it.  Put it anywhere you need a splash of color or to hold those oversized books neatly.

Thanks for visiting!  Check out Proxxon tools next time you get a chance.  Small precision tools are so easy to use.

Sunday, February 25, 2024

Building Patriotic Buntings For Tiny Houses


Today I will show you how I built tiny patriotic buntings for one of my tiny houses. This simple project adds so much character to my fence. Follow along with me and I'll show you how I made them.


Supplies:
     1/16" Balsa Plywood
     Proxxon 2 Speed Scroll Saw DS460
     Plaid Paint


First, I determined the size I needed the buntings to be and drew a pattern.


I then drew the pattern on my balsa wood. Using my Proxxon Scroll Saw I began to cut them out. For the fence I needed 6.


The Proxxon Scroll Saw does such an amazing job that I didn't even need to sand the edges. If this were a thicker piece of wood, I'd imagine that to be necessary. As you can see in this picture, I even stacked 2 pieces together and cut.


Now all 6 pieces are cut out and ready to paint with my Plaid paint.


Using various shades of red, white and blue, the buntings are painted. I used a tiny awl to poke a hole in each end and attached them to the fence with sewing thread.


Here is my completed project.  Just wanted to add that every element of this tiny house was created using Proxxon tools.  Hope you enjoyed following along with me.
Colleen :-)


Sunday, February 18, 2024

How to Make a Jaunty St. Patrick's Day Gnome Using Proxxon Tools

 St. Patrick's Day is right around the corner. Time to make this jaunty St. Patrick's leprechaun gnome. 

Here are the supplies and equipment that you'll need:

Let's make the St. Patrick's Day Gnome:

  1. Print the gnome template of your choice, and cut out the shapes.
  2. Mount the shapes on your wood blank. Cover one side of the blank with painter's tape. Mist the back side of the pattern with spray adhesive, and mount on the taped blank. The painter's tape makes removal of the pattern easy without leaving any sticky residue.
  3. Cut out the body, hat, hat band, beard, and nose shapes using the bandsaw or scroll saw. For the nose, you can substitute a ¼" length of dowel rod. I used a slice of 5/8" dowel rod for the small gnome.

  4. If you're using the gnome as a wall hanging, you'll only need to cut one of the feet pieces. If you want him to stand, I recommend cutting two of the feet pieces. So the two feet are exactly the same, glue two blanks together. When the glue is dry, mount the pattern and cut out the feet.

  5. Sand the edges of all pieces using the Delta sander. I use the Delta sander mounted in the Precision Vice FMZ so both hands are free to manipulate the piece I'm sanding.

  6. Sand the inside curve of the hat using the flexishaft and a sanding drum.

  7. Paint the pieces.

  8. Glue the pieces together with liquid adhesive. First, glue the beard to the body, then the hat, next the hat band, and nose. Finally, glue the feet in position.

  9. Add handing hardware if the gnome will be a wall hanging.
  10. Hope this leprechaun gnome brings you luck and a pot of gold.

Carole