Saturday, May 26, 2018

A Cute Laundry Room Helper

Well my Proxxon Tools and Plaid Paints helped me create a cute laundry room helper, or just a cute piece of laundry room decor. haha


Supplies needed for this project:

Wood - 1 piece 11"X 14", 2 pieces 2" wide and 11" long cut on a 45 degree angle, and 2 pieces 2" wide and 14" long cut on a 45 degree angle.
Proxxon Band Saw
Proxxon Delta Sander
Plaid Mod Podge - Glossy
Plaid Home Decor Chalk Paint - Yellow Crochet
Sharpie Marker - Wide
2 Paint Brushes
Napkin
Scrapbook Paper
String
Decorative Upholstery Tacks
Hammer
Scissors
Tiny Clothespins
Large picture hanger w/brads


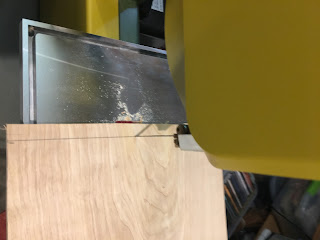
To begin with I cut out all of my pieces of wood on the Proxxon Band Saw
I then used the Proxxon Delta Sander to sand off any rough spots and splinters from the wood.
I took my scrapbook paper and decoupaged it to the base piece of wood before I tacked on the frame part of the project. I decoupaged it and then used the Plaid Mod Podge glossy to put two coats of the Plaid Mod Podge on top of the paper.
I then painted the frame part of the project with the Plaid Folk Art Home Decor Chalk Paint in Yellow Crochet. Once this was done I cut some butterflies out of a napkin and decopauged them to the frame with the Plaid Mod Podge - Glossy and added an extra couple of coats on top of the butterflies. 


I took my wide Sharpie and wrote the saying " Clean. Single. Looking for a mate" on the frame and applied three coats of the Plaid Mod Podge - Glossy to the whole frame. I flipped it over when dry and tacked on the picture hanger. I tacked on the string using upholstery tacks to hold it tight, and using the tiny clothespins I hung up three baby socks which really didn't have mates.

I thought this turned out really cute and I have a nephew whose daughter's socks were lost that this may go to lol. (I think the washer eats them).
Please take the time to look at all of the tools that Proxxon has to offer at: www.proxxon.com. These tools are designed to be used by the home hobbyist/crafter/artist. The products that Plaid has to offer are amazing in their own right and you can check them out here: www.plaidonline.com . Plaid has come out with so many new products in the last month or so, that it is really worth your while to look. Also, please leave me a comment here on this blog and let me know what you think of this project. I read every comment and appreciate every one.

Barbara


Friday, May 25, 2018

How to make a fence sitting bird feeder

     We have so many birds this year!  Even though we have a dozen or so feeders in the yard I figure there is always room for one more.  And never have I  heard a bird complain yet.
Today I thought I would make one, just a little bit different.  I wanted this one to sit on the fence post by the garden.  That was my only preconceived notion.  And... I wanted to use up some scraps I have lying around in the shop.

Here is what I used

Materials:
1" x 6" x 28 " piece of old fence board.
some gourd scraps  (for his hat)
small screws
wood glue
hot glue sticks
scrap of material
twine (optional)
easy tack by krylon

Equipment:
proxxon band saw
proxxon mini table saw
proxxon mini jigsaw
proxxon delta OZI/E sander
hot glue gun
drill or rotary tool
proxxon brad point bits or similar


To start I laid out a pattern of sorts on some paper that was the same size as the board I was going to use.  My initial thought was to make a scarecrow kinda guy.   I took my pattern and glued it to the board with easy tack by krylon.  This will make my pattern easy to cut without the need to actually transfer the design to the board.  The paper can be removed easily later after the pattern is cut.


I used the proxxon mini table saw to cut out my straight pieces and I used the proxxon mini band saw to cut out the curves and angles.  


Don't forget to sand everything smooth.  Nobirdy likes splinters!  🐦 
I used the proxxon delta OZI/E sander for this because it makes it so easy.


Now that I have all my pieces cut out and sanded smooth it is time to decide what this little man is going to look like. So let's start painting.  Thanks to plaid paints there are so many colors to choose from.  So... I just started painting.  


Then I drilled 2 holes in his shoes using the proxxon brad point bits and strung some shoelaces just for fun.   But now... his bald head was...just way too much.   I thought about hair, but instead decided on a hat.   Yes...!! a wide brimmed hat would work and would help cover the birdseed bowl to keep it dry when it rains.  And, I have a bunch of gourd scraps that might just work....


After cutting the hole with the proxxon mini jigsaw  so that his hat would fit I noticed his head sticking up through the hat!
We can fix that.  Let's remodel this hat.
I used proxxon's brad point bits to drill holes around the brim of the hat and I threaded some old twine into the holes.   Then I added another scrap piece of gourd to the top of the hat.  I glued the top of the hat to the brim and the hat to his head using gorilla glue.  It was nice and secure.  I made a hat band out of a scrap of old towel to hide the seam and glued it on with hot glue.  In the picture below I have it taped while the glue dries.    Check out those brad point bits.  I love them.
                                                                                             brad point bits from proxxon for drilling accurate holes.  

Now it is time to put him all together.   I used one screw each to attach his arms to his body.  I attached his "lap" perpendicular to his body and secured it with 3 screws.  His legs are attached to the lap with one screw each and can be positioned in different poses.  Feet are attached to his legs with 2 screws.  His hands are glued with hot glue to the seed bowl.  


sitting on the workbench
Notice his gourd bowl for birdseed.


Now he is outside, sitting on the fence that surrounds the garden.   He looks happy!


Thanks for stopping by.   Have yourself a fun day!  If you get the creative bug make one of these little guys and watch how many birds will come.    Seems they are always hungry!
Thanks Terri, Thanks Proxxon, Thanks Plaid for all your support.

Till next time.   Remember to have fun   Carol


Sunday, May 20, 2018

How to Make a Useful Trivet from Scrap Wood

Just about any piece of scrap wood can be transformed into a useful trivet. This is a great beginner project for learning more about your Proxxon tools!

Supplies and Equipment for a 5" x 5" Trivet

Instructions for Making the Trivet

  1. Measure and mark the 5" lengths for the trivet sections. You can vary the dimensions and number of section for your trivet—just be sure to adjust the length of the threaded rod and the number of nuts and washers that you will need.
  2. Cut the trivet sections to appropriate lengths using the band saw.
  3. Experiment to find the right number of washers and nuts between each section. I used one hex nut with one washer on each side between the sections. When you're satisfied with the spacing, measure the width of the sections and the spacers. Add ½" to that length (¼" for each side) to accommodate the acorn nuts on the outsides. This is the length that you will need for each of the threaded rods.
  4. Mark the appropriate lengths on the threaded rod, and using a hacksaw, cut the rod to length.
  5. Measure and mark the holes where the threaded rod will pass through the wood sections. I marked my pieces 1" from the end and centered on the ¾" side.
  6. Mount the adjustable chuck on the bench drill press, and using a 5/16" bit drill the six holes that will serve as channels for the threaded rod.
  7. Use the disc sander to smooth any rough edges.
  8. To assemble the trivet, begin by screwing an acorn nut on one end of each of the rods. Next, add one wood section followed by your washers/nuts spacers. Add the second section of wood, again followed by your spacers. Add the last section of wood, and the final acorn nut on the end of the rod.
  9. Enjoy using the trivet that you fashioned from scrap wood!!

Friday, May 18, 2018

How to Make a Gourd Shard Necklace

Tools I used


Proxxon Jig Saw


Proxxon OZI/E Detail Sander
Proxxon Rotary Tool
Needle


Supplies I used


Martha Stewart Marbling additive
Plaid Paints
Beads Of your choice
Sinew for stringing beads
Krylon Crystal Clear Sealer
First step was to find a piece of gourd that had just the right curve to lay on the chest nicely. Then, using the Proxxon Jig saw,  I cut the piece in the tear drop shape I wanted.  
It was not just the shape I was looking for so I used the sander to finish shaping the shard.


Sorry no one around to take a photo of me sanding this
 so just showing you what this tool looks like.
It is a favorite of mine.


This is the shape I was looking for and gee, I found it lol   Poured this paint on to see if I had the right mix of paint to additive.  It was going to flow nicely.
This Martha Stewart Marbling medium was such a pleasure to work with. Just add to your paint and it is as close to a no fail pour as possible. This does not make the cells that a mixable fluid does. It of course does not cost as much as some of the two or three other additives call for and you do not need a torch. So easy.


picked my color mix and
poured directly on the shard, and loved the way it flowed and the mingling of colors.
The dark blue looks like a inset stone.


Lastly before beading I used my Proxxon Rotary tool
to drill out beads where the hole was too small to take the Sinew.
It did a fine job and took a tedious task and made it super simple.


This is the finished Product Sprayed with Krylon Crystal Clear Triple Thick


Hope you found this an easy and simple, but lovely project.
Pick colors of your choice to match any color scheme, a very nice addition to the wardrobe, and does not add a lot of cost for the link that pulls it all together.
This necklace does not have a clasp that will come apart on you but is put over your head.
Nothing  to fall apart.


Like to thank all of the friends and follows that visit this Blog, and leave their comments.
You are the reason we are still here. Thank you very much, We appreciate your time
and efforts on our behalf.

We also would like to thank Proxxon Tools who has been so kind as to support this blog. These mini tools are most excellent to work our crafts with and so light and easy to use. Love mine.
Also like to thank Plaid paints for their continued support. If you have not visited and seen all the new items they have to offer, please do, it is amazing all of the different items they carry and develop.
Terri Sproul is our mentor and point of contact for all of the sponsors. She works on the behalf of the sponsors  and ourselves and does a bang up job for both parties. Many thanks Terri!!


Wednesday, May 16, 2018

Blue Bird of Happiness by Steph

Hi everyone, Steph Ackerman here today using an assortment of Proxxon tools to create my mixed media project.


Supplies:
Imagine Inks
Petaloo, Prima flowers
The Robin's Nest Dew Drops


This bird has been in my stash begging to be altered so I thought it was about time to create my Blue Bird of Happiness.

I began by using the Delta Sander to sand the bird.


Next, I used the Drill Press to drill a hole for his eye and 2 holes for the hanger.


I wanted some decorative details in the wood so I used the Power Carver to carve lines in the body and the tail.


I used Plaid Coastal Texture Paints in High Tide and Largo Blue to paint the bird.  I then painted Seal Grey about the body using a baby wipe to blend the colors.


Next, I added some texture by inking a grid stamp with VersaFine Clair Pinecone Ink and stamped it randomly about the bird.  Then I added a touch of ColorShift orange paint on his beak


Now that the base work was done, it was time to decorate.  I had lots of blue flowers, so I selected some Petaloo and Prima flowers.


To finished, I added The Robin's Nest dew drops as flower centers.


Thanks for stopping by.

Steph

Saturday, May 12, 2018

Proxxon Tools and Plaid Paint


Proxxon Tools and Plaid Paint most definitely helped to create this awesome shelf. I think most people know that I love to Repurpose, Reuse, and Recycle things and in this project I took a very old, ugly, and broken picture frame and turned it into something useful and pretty.

The Supplies Needed For This Project: 
picture frame (8'x10")
plywood
small nails
wood filler
glue
hammer
paint brush
container with water to clean brushes
hanger for back of shelf


Cut "backboard" of shelf 8 X 10 inch sq. to fit inside frame of same size.

Cut 5 strips of 1/4" plywood 2 " wide and 10" long with your Proxxon Band Saw

Cut 2 of the 5 strips 71/2" long for the sides also with your Proxxon Band Saw
Cut 1 of the 5 strips 91/2" inches long for shelf once again with your Proxxon Band Saw
The 2 remaining strips will be 10" long.

Assemble the side pieces and the 10" long pcs. to form a box 8X10 in. sq.
Tack on your backboard piece which was 8X10" sq. to your side pieces and then add your shelf piece inside the box at the desired height. After you've finished your box, you need to do your repairs to your picture frame ie: glue all of the cracks together, fill in any imperfections that may need it and let dry overnight.You then install your assembled box to the frame by tacking it together. Paint the whole thing with the Plaid/Martha Stewart Home Decor/Fledging Paint and then dry brush the front of the frame with the Plaid Folk Art Outdoor Paint/Cabana. Once dry spray seal the entire project, and add the hanger on the back of the box/frame.
Enjoy and show off your favorite knick-knacks!
Please leave me a comment below and tell me what you think of this project and check out all the wonderful tools at www.proxxon.com and the terrific products at www.plaidonline.com

Barbara

Friday, May 11, 2018

How to make some simple organizer boxes for your workroom

Hi everybody.   I wonder, if you are like me and have hundreds of little pieces of this and that which don't really have a home but desperately need one?  This project is really cool for organizing that kind of "stuff",  and you can work it around any space you have on any wall.  Make it big or small or any combination there of.  I originally made a big one to hold the big bag of dry cat food keeping it off the floor.  Making it smaller and more of them works well for my crafting supplies.  What is unique about this is that it is simple to take down the little, (or big), box with the "stuff" you want to use, then when you are done return the box to it's place on the wall.  I found when things have a dedicated space they might actually be there when I am looking for them next time.  Also, this leaves my level spaces free to work on instead of having them cluttered with supplies.  

All right, now, I think it is time to get started.


Tools and supplies 
1/4" plywood for sides and bottom
1x6" pine board for front and back
length of 2x 4 equal to length equal to back of boxes (or wall space)
wood glue
small nails or screws
clamps.
plaid paints to decorate if you choose.


The first thing I did was to cut my 2x4 to the length I had available on my wall.   Next I set my table saw at a 45 degree angle and cut down the length of my 2 x 4.  see picture below.  The 2x 4 piece is black on this diagram.    Hopefully you can see how they will fit together and hold the box on the wall.  

I mounted my wall piece to the wall using screws.  I made sure to find studs so my holding piece will be very secure.  I used the kapro prolaser nail gripper to find a level line and the kapro measure mate 313 to measure and mark my line on the wall.  I want it straight and level.  😀


The next step is to simply make the boxes.  These will be cut to your appointed size to fit your space.
    I had a 24" space I could use so I cut mine:
sides= 8 1/2" x 6"   back= 6"x4"   front 6"x6"   bottom 7 1/2" x 6"
this made room for 4 boxes.


I used the kapro measure mate 313 to measure and mark my lines and then I cut them all in production mode using my proxxon mini table saw FET

I made my front pieces a little taller so I could add a little decorative touch to make them mine.  Might as well perk up my walls with some color. 
 I drew flowers on them and cut them out using the proxxon band saw   This of course is an optional step.  But I say why not make it pretty?  Besides, I really enjoy using my proxxon band saw!


Sand everything smooth.   No splinters!   Yay for the proxxon delta OZI/E sander.  It gets the sanding done fast and is easy on the hands and ears!


Now let's put this together

First, don't forget to secure the cleat onto the back of your boxes.  Make it secure and tight.  Pointy end down.  If you want your boxes level with each other be sure to measure each one.  I used glue and screws to secure mine. 


Now put the boxes together. 
A little glue some clamps then add some nails for strength.  I put the sides on the outside so I could nail into the thicker front and back. 

making sure it is going to fit prior to gluing.

Oh, notice I painted my flowers using plaid paints.

All done now and hung on the wall.   Wish I had a little more wall space so I could make some more.  I still have a lot of "stuff" looking for a home.  But this is a start and it was fun to make. 


Remember you can take them down, then put them back when your done.  

Thank you proxxon, kapro and plaid.  Thanks Terri, and thank all of you who read this.  Have a great day.   Be Safe!!

  See ya next time    Carol