Showing posts with label proxxon mini jigsaw. Show all posts

Thursday, February 17, 2022

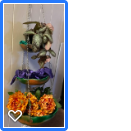
How to make a 3-tiered plant hanger from gourd pieces

 Hi again.,   Time for another project made from recycled goodies.  I am a member of a group called the gourd patch and we get together about once a month and make things out of gourds.  I have been saving up some scraps and now it is time to put them to use.  We are going to make a hanging plant holder out of some of these extra gourd pieces.   You would be surprised at how versatile the humble gourd is.  Remember the native Americans used them for many purposes.  They are naturally waterproof and strong.  Let's see what we can make.

Supplies and Equipment.

Gourd pieces (preferably the bottoms of 3 escalating sizes of gourds)

Proxxon mini jigsaw

Proxxon proffessional rotary tool

Proxxon cordless mini belt sander

spray paint or other decorating medium

about 10 feet of light chain or rope

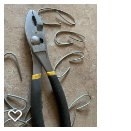
pliers,  

heavy gauge wire.

(I used some pennies 18cents worth) as an accent and to strengthen my gourds)


Ok, let's get started.   First, I want to show you a raw gourd, which is a good place to start if you haven't collected scraps.  Warning, they come dirty and need a bit of elbow grease to spruce them up.  Nothing that a pot scrubber can't fix.


After cleaning it up, I drew a pencil line around the gourd where I intend to make my cut.   Then I used my Proxxon professional rotary tool and a 1/4" brad point bit to make a small hole just above my line.  This is where I will insert my saw blade to cut the gourd.


I simply followed my line and cut the bottom of the gourd off


After scraping away the mess inside I decided to scallop the edges which I did using the Proxxon mini jigsaw again.  Then I picked up my Proxxon cordless mini belt sander and smoothed everything.  


I used spray paint to decorate my 3 "bowls"

When everything was dry I used my Proxxon rotary tool to drill 3 holes equal distance apart in each gourd bowl approx 1 inch down from the top.  
I got to thinking that with the weight of the flower pots maybe the wire might pull through the gourd so I took an extra step and made my own washers out of pennies that I drilled the same size hole in using again the Proxxon professional rotary tool.  These I glued to the inside and outside of the gourd where the wires will go through.  


I bent my wire to make hooks where i will fasten the gourds to my chains. 


Lastly, I cut my chains into 3 equal pieces and attached the gourds to them using the hooks.  Look you can hang your bathroom supplies or other things if you want.  But I am going to use it for some small potted plants.


That's it.   This project has a lot of potential.  I took a shortcut with the spray paint.
You can do better.   It's a fun project.  Give it a try.  
 Thanks for visiting.  Check out the Proxxon site.  These smaller tools are fun and easy to use.
Till next time,  Play safe.   Carol


Thursday, September 16, 2021

Proxxon tools for gourd fun. Part 1 Easy to make bird feeder

Hi everyone.  Carol W  here.  I recently was blessed with the gift of gourds from a new friend of mine.   She was moving and clearing out stuff and thought of us when she came to her gourds.  OMG, she showed me her workshop and the things she had made from gourds and I left with new ambition.  BTW, I noticed she had quite a few Proxxon tools as well, but of course she was taking those with her.  Can't blame her.  Anyway,  today I want to show you how to make an easy bird feeder from a medium to big gourd.  Of course you could use a small gourd too.    Let's get started.


Equipment and supplies

1 nice gourd with medium to thick walls

a pencil  

tape measure (optional)

Proxxon tools,  You have your choice here, as you will see below.   I used the proxxon mini jigsaw, the Proxxon professional rotary tool with a cutting disk, Proxxon OZI//E sander with the cutting blade.  I tried them all to see how they worked for cutting the gourd and they all worked fine, so you have your choice of tools for this one

Proxxon OZI/E sander, and or Proxxon mini belt sander  (I used my new cordless mini belt sander and it works like a dream for sanding small places.

Plaid paints   (you know you gotta decorate!)

Strap, wire, twine or whatever you choose to hang your birdfeeder  (About 24 inches)

Proxxon Professional rotary tool with drill bit or rasp cutter.

Seems like a lot of equipment, but it really isn't.   I'm just giving you choices.  


Let's get started.   First thing to do is pick out a gourd.  I mentioned it above but you do want one that is fairly sturdy.  It is going to be outside in the weather after all. 


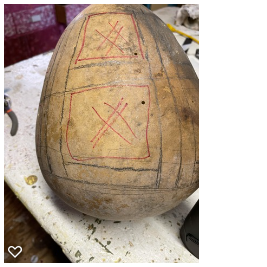
We  need to make some marks on it to guide us when we are cutting our gourd.  Things to consider:   I need to leave a "bowl" in the bottom to hold my bird seed.   I need to keep the top intact so that I can attach a hanger and also this will help keep the seeds dry.  Thirdly I need holes in the sides to the birds can get to the feed.   Mine below is a simple design but I could get fancy,  (but not today.  LOL)

So I am going to draw some simple windows on mine.   I am using a pencil because it can be washed off easily


Now to choose your cutting tool"


I chose the Proxxon mini jigsaw to do my cutting.   And I cut out all my windows.


My edges are sharp so I use my Proxxon OZI/E delta sander and my Proxxon mini belt sander  to smooth them.  I like rounder edges so as not to hurt the birdie's feet.   Check out the before an after photos below 


You can drill some holes in the top now and attach your hanger or you can do the added step below.

From a scrap of gourd (hopefully a cut off top or bottom, fashion a hole that will fit over the top of your gourd.  This will serve as an umbrella of sorts.
I made my hole just big enough to slide the bottom gourd's stem through.


It looks like a mushroom to me, so.... Using my plaid paints, I paint it like a mushroom.  After a quick coat of spray sealer, I hang it outside with seeds inside and wait for the birds to show, and they will.   Hey it is all done!   It should last a long, long time. 


Thanks for visiting,  Come back soon.  We always have something new to make here.  Thank you Proxxon tools       Catch you next time  Carol


Thursday, March 18, 2021

Hot air balloon gourd birdhouse and feeder

Welcome spring!   my favorite time of the year  👩
I am all excited and starting to get that spring fever I get every year.  Time to be outside again.   I want to show you a cute little project today.  We are going to make a birdhouse and feeder that resembles a hot air balloon, and we are going to make it out of a gourd.  We will be using Proxxon tools and Plaid paints.  


Supplies and equipment:
1 or 2 gourds   (one to look like a balloon and one to cut for a basket)   
Proxxon rotary tool with drill bits
string
pony beads or buttons
epoxy sculpt (optional)
small dowel (optional)
sealer of your choice
Plaid paints of your choosing
small eye hook for hanging
wood glue.

Let's get started.   See below.  I picked out 2 dirty gourds.  One is an old birdhouse that has seen better days, but the top will work for our basket.   First step is to get these cleaned up.  A little water, elbow grease, and  a scouring pad does the work.


Mark on the gourds where you intend to cut.  On the large gourd you want to mark a circle about 1 1/2" in diameter. (the entrance hole to the birdhouse.  ** remember you will be turning the gourd pointy side down to hang**)  On the small gourd we will use the top as a "basket" for our hot air balloon.
Then cut along your marks using the Proxxon mini jig saw


Using the Proxxon OZI/E delta sander, sand the edges of the hole and the top of the basket.
Cut gourds have very sharp edges.


Next, mark 6 evenly spaced holes on the "balloon" and on the "basket" where we will attach the strings suspending the basket.  Then drill the small holes using the Proxxon professional rotary tool.  I also drilled 3 holes in the bottom of the balloon for drainage.  


Optional step-   I was worried about the thinness of my basket piece and how it would hold up to the elements outside so I used epoxy sculpt to make a band around the outside of the basket.  When it dries it is hard as cement and should keep the strings from tearing out of the basket.


Next step is to paint like crazy.  Better yet, let the kids do it.! 👦👧
I always use Plaid paints for the huge selection of vibrant colors.
Be sure to seal your project since it is going outside.  I used Krylon triple thick gloss, (2 coats)


I used 6  -  16" pieces of string to attach the balloon to the basket at the holes we previously made.  First tie one end to a pony bead.  Next from the inside thread the string through the hole in the basket. (the length of string should come out of the outside of the basket with the pony bead inside.


  Next, thread the string through the small holes in the balloon part, pull it out the big hole, tie a bead on it,  Try to keep the strings even.   I used chalk to mark a line where I will attach to my balloon.   You will eventually need to cut part of the string off,  It is too long to start, but that was to give you room to work with it.  
I had to do some adjusting at the end to get it to hang right.  This is easily done at the basket attachment.   I also added some small dowels as perches for the little birds.


An eye hook in the top and it is done.  Don't forget to fill it with bird seed.   Check it out hanging in our Plum tree.  

Thank you Proxxon, and Plaid.  2 awesome companies check out their websites!!

And thank you for visiting.    Till next time ...Carol 


Thursday, October 1, 2020

How to carve a gourd pumpkin

Halloween is almost here and it is time to start thinking pumpkins, carving pumpkins and jack-o'-lanterns ðŸŽƒðŸŽƒðŸŽƒðŸŽƒ   I love pumpkins, and I enjoy carving them, but it's a little sad when the pumpkin begins to shrivel up after just a few weeks.   This year I am going to bring out a few of my smaller gourds and show you how easy it is to carve them using Proxxon tools.   And these "pumpkins" will last forever.  


Equipment and supplies

Small pumpkin shaped gourds

Proxxon mini jigsaw

Proxxon rotary tool with small drill bit or a sharp awl.

Plaid paints

sealer of your choice

2 small hinges + one small latch

super glue and small screwdriver

velcro dots

1 battery powered candle light.


Let's get started.   First we need to choose a gourd   Warning gourds start out dirty!  But they are easy to clean using steel wool and water.


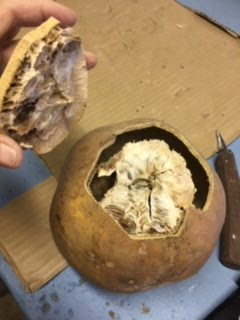
Now we are going to cut him open.   It is always a surprise to find out what is inside.

We need a small hole in order to insert our jigsaw blade.   If you have a Proxxon rotary tool this is perfect for drilling the small hole.   If you don't you may punch a hole using a sharp awl.


Using the Proxxon mini jigsaw I cut out the bottom of the gourd.  Notte that I made a zig-zag in my cut.   This is to make it easy to put back together properly.   Also it is important to make a straight edge where we are going to attach the hinges later.    OK let's open her up.  


Lucky me, it is dry and easy to remove.   Now my pumpkin is hollow.

Now to design a jack-o'-lantern.   I drew a simple face.   You can be more creative!


I cut it out using the Proxxon mini jigsaw.  It was a breeze!

Optional step:
Using the proxxon rotary tool with the bull nose rasp cutter I added some hair and a label on the back.


Ok back to our original plan.   We are going to add hinges to the bottom of our gourd and a latch to keep it shut.    I used glue to first affix the hinges then added very small screws.   I did the latch in the same way.


For candlelight I put velcro on the inside of the bottom of the gourd and the other side to the bottom of my battery powered candle.  That way I can open the bottom of the gourd, stick the candle on the velcro and shut the gourd.   I used some watered down plaid paints to give my pumpkin his orangey color.    And we are done.  


😀😀😀My candle changes color.  😀😀😀


Thanks for visiting.   I hope you have a happy and safe halloween.    
Thank you Proxxon and Plaid.

Check out these fine products.   Just click on the links above.   
Have fun!   catch you next time  Carol