Thursday, October 15, 2020

How to make an activated turtle pull toy

 Hi everybody.  I feel like it is time to make something for the kiddies. This is fun for me too.   I love making toys.  This was an interesting  project and I think it came out pretty good.  Gave me a chance to use a bunch of different tools and skills.   We are going to make a turtle with head and tail movements 

Check out this little short video, just to see the movement we are after


Ok playtime is over, let's  get started


Equipment and supplies 

Rounded gourd piece (something that looks like a turtle shell shape)

1/4" plywood piece (big enough to cover the bottom of the turtle shell

thin scrap wood

2 x 2" pine  approx 6"

4 small wood wheels

Wood glue

Proxxon mini jigsaw

Proxxon OZIE delta sander

Proxxon mini bandsaw

Proxxon disc sander

(2) 1/4" dowels 12" long

Plaid paints

Proxxon angle grinder (optional)

drill and drill bits


here is a rough outline of what we are going to do.


First thing to do is to cut the bottom off a gourd.  This is done easily with the Proxxon mini jigsaw.
set this aside for now.


Next draw a rough picture of a turtle head on the 2x2
 piece.   Do the same for the turtle's tail. Cut it out on 
Note how it is drawn on 2 sides.  We are going to cut this out on the Proxxon's mini bandsaw  to give us a rough shape of our head and tail to start with.


Next take the two pieces to the Proxxon disc sander and shape them into your head and tail pieces.


Back to the turtle shell.   Lay it on top of your 1/4" plywood piece and trace an outline on the wood.  Extend your line about 1/2" larger than the gourd "shell"  Then cut it out on the Proxxon mini bandsaw.

Note where you are going to put the head and tail and cut out a semi rounded notch that will fit the turtle's neck and tail.    Do the same on the gourd shell.  Make sure the head and tail will fit and have room to move.


Now for the mechanical part.
Wheels first.  

Drill a hole about half way through the wheel off center  see above.   Hopefully there is already a center hole that goes all the way through.  Make sure your dowel rotates easily in the center hole but is held tight in the offset holes. Cut 2 dowel pieces into 4" pieces.     Drill a generous hole in the turtles neck through which the offset dowel will go through and glue the dowel in the wheel holes.  Make sure the wheels are lined up with the holes in the lowest position.  Do the same for the tail.

Lay your head and tail wheel assemblies on the bottom of the turtle base and mark a square to be cut out that will allow the mechanics to be partially submerged into the body.
Cut out the square using the Proxxon mini jigsaw.


Now take your small pieces of wood you cut out earlier and drill a 1/4" hole where the offset axle will go.  See picture below.  I used tape on the dowel to keep the tail in the middle but really it did not need it.  Note the centered axle is just a short piece of dowel glued into the hole and the wheel spins freely on it.
 

Glue the turtle shell onto the bottom of the turtle with mechanics inside. The raised piece we glued to the bottom goes inside the turtle shell.


Glue some feet on and paint your turtle.  On the picture above I used the proxxon angle grinder to carve a pattern on the turtle shell.  this step of course in optional but fun to try.

I used plaid paints to paint my turtle.  Then I attached a string to make him a pull-toy.  He works good.  His tail and head really get moving.   I think the kids will have some fun with him.👧👨
 
Honestly it wasn't that hard to make.  It took a little patience is all.   Thank you all for visiting.  Thanks to Proxxon, my favorite tool maker!, and Plaid my favorite paint maker  
Catch you next time....  Carol


Building A Tiny House - Part 1


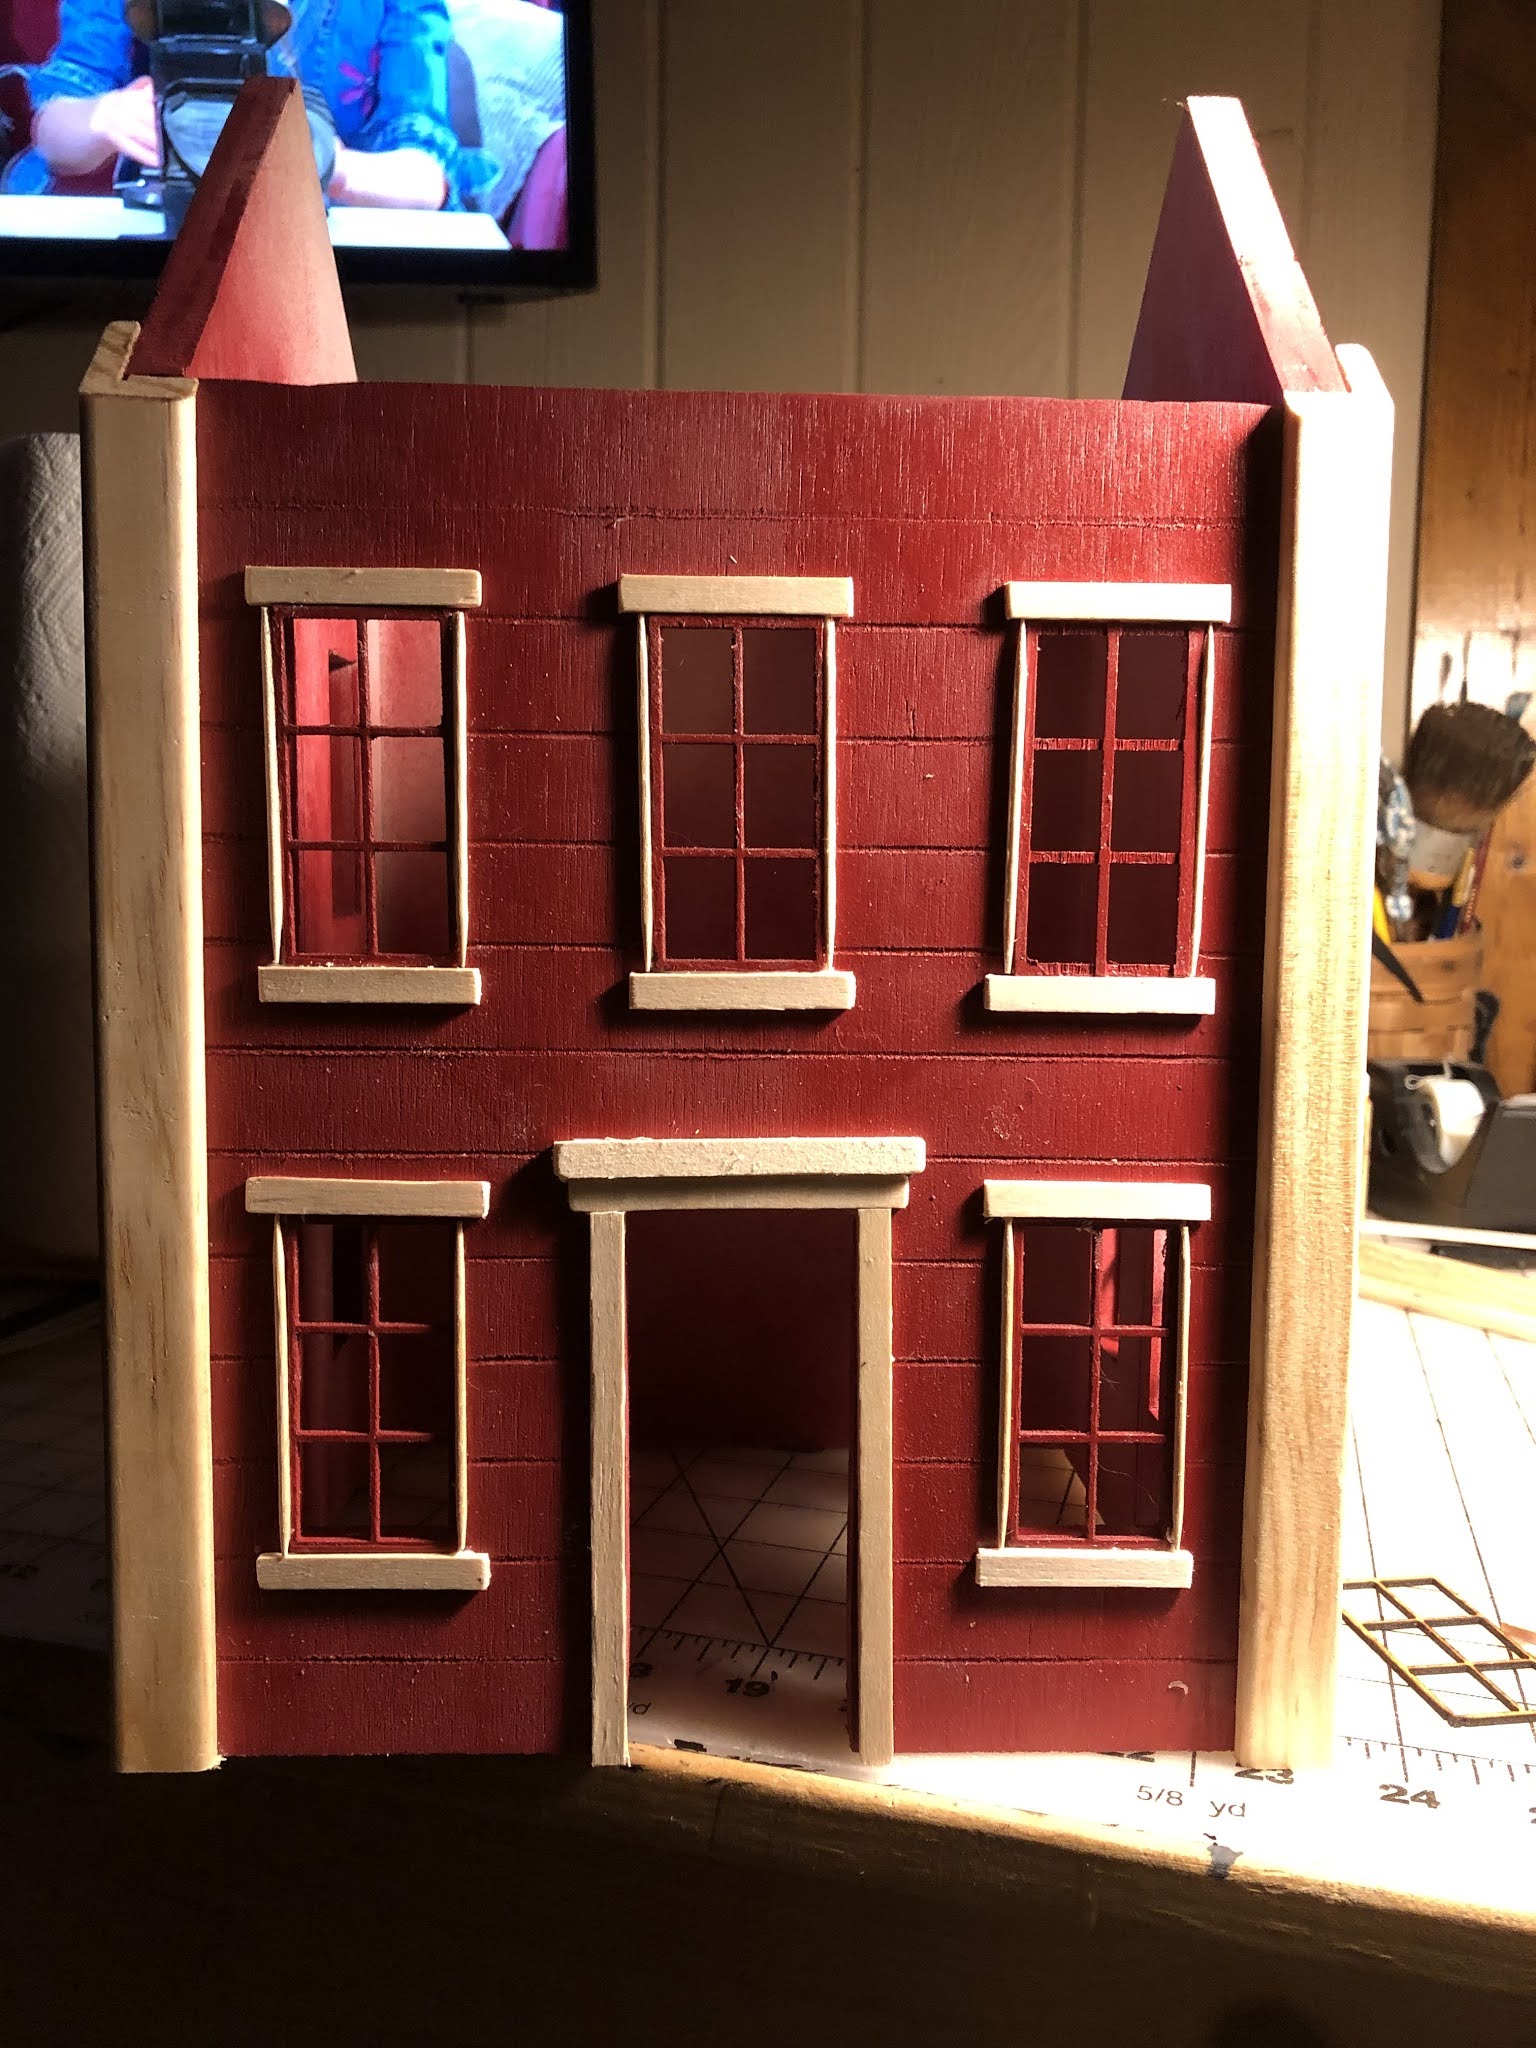
  Hi friends!  I've been working on making some miniature houses and barns that eventually I'll be selling. Today I'll show you Part 1 of making my tiny two story house using Proxxon tools.


Materials List

  • Proxxon Micro-Bandsaw
  • Proxxon 2 Speed scroll saw
  • Proxxon Delta sander
  • 1/2" birch sanded plywood
  • Wood corner molding 
  • Craft sticks  various sizes
  • Wooden windows  
  • Wood glue
  • Brad nailer and brads
  • Drill and drill bit
  • Paint     


I drew out my pattern pieces on graf paper and transferred them to my plywood


Using the Proxxon Micro-bandsaw I cut out the two sides, a front and a back.


I now have to cut out the windows. In order to cut them I drilled a hole in each window big enough to pass the blade of the Proxxon Scroll Saw through. Bringing the saw blade though the hole then reattaching it to the saw. Cut out the windows and door using the Proxxon scroll saw.  I tried one of the window panes in to make sure they fit.


Fit the sides, back and front together. Glue and nail in place with the brad nailer.


The tiny window panes were made from 1/16" craft wood. They were made with a laser burner. I fit the windows in and glued using wood glue.


Once everything was assembled I lightly sanded using the Delta Sander then painted with red spray paint.


Using the Micro bandsaw I cut pieces of corner molding for each of the outside corners and attached with wood glue and brad nails


With the Micro bandsaw I also cut out various pieces of craft sticks to trim out each window and the door.


Check out my next months blog for the completion of my tiny house project :-)


Friday, October 9, 2020

Making Your Own Home Decor-Miniature for a Dollhouse


Thank you for stopping by on my latest project on my dollhouse journey.  Bear with me, as I am new to all this and showing you the layman's way of working with tiny tools.  Today I am working on making furniture and home decor for the dollhouse. When you are working on such small projects Proxxon makes these projects so much easier. 

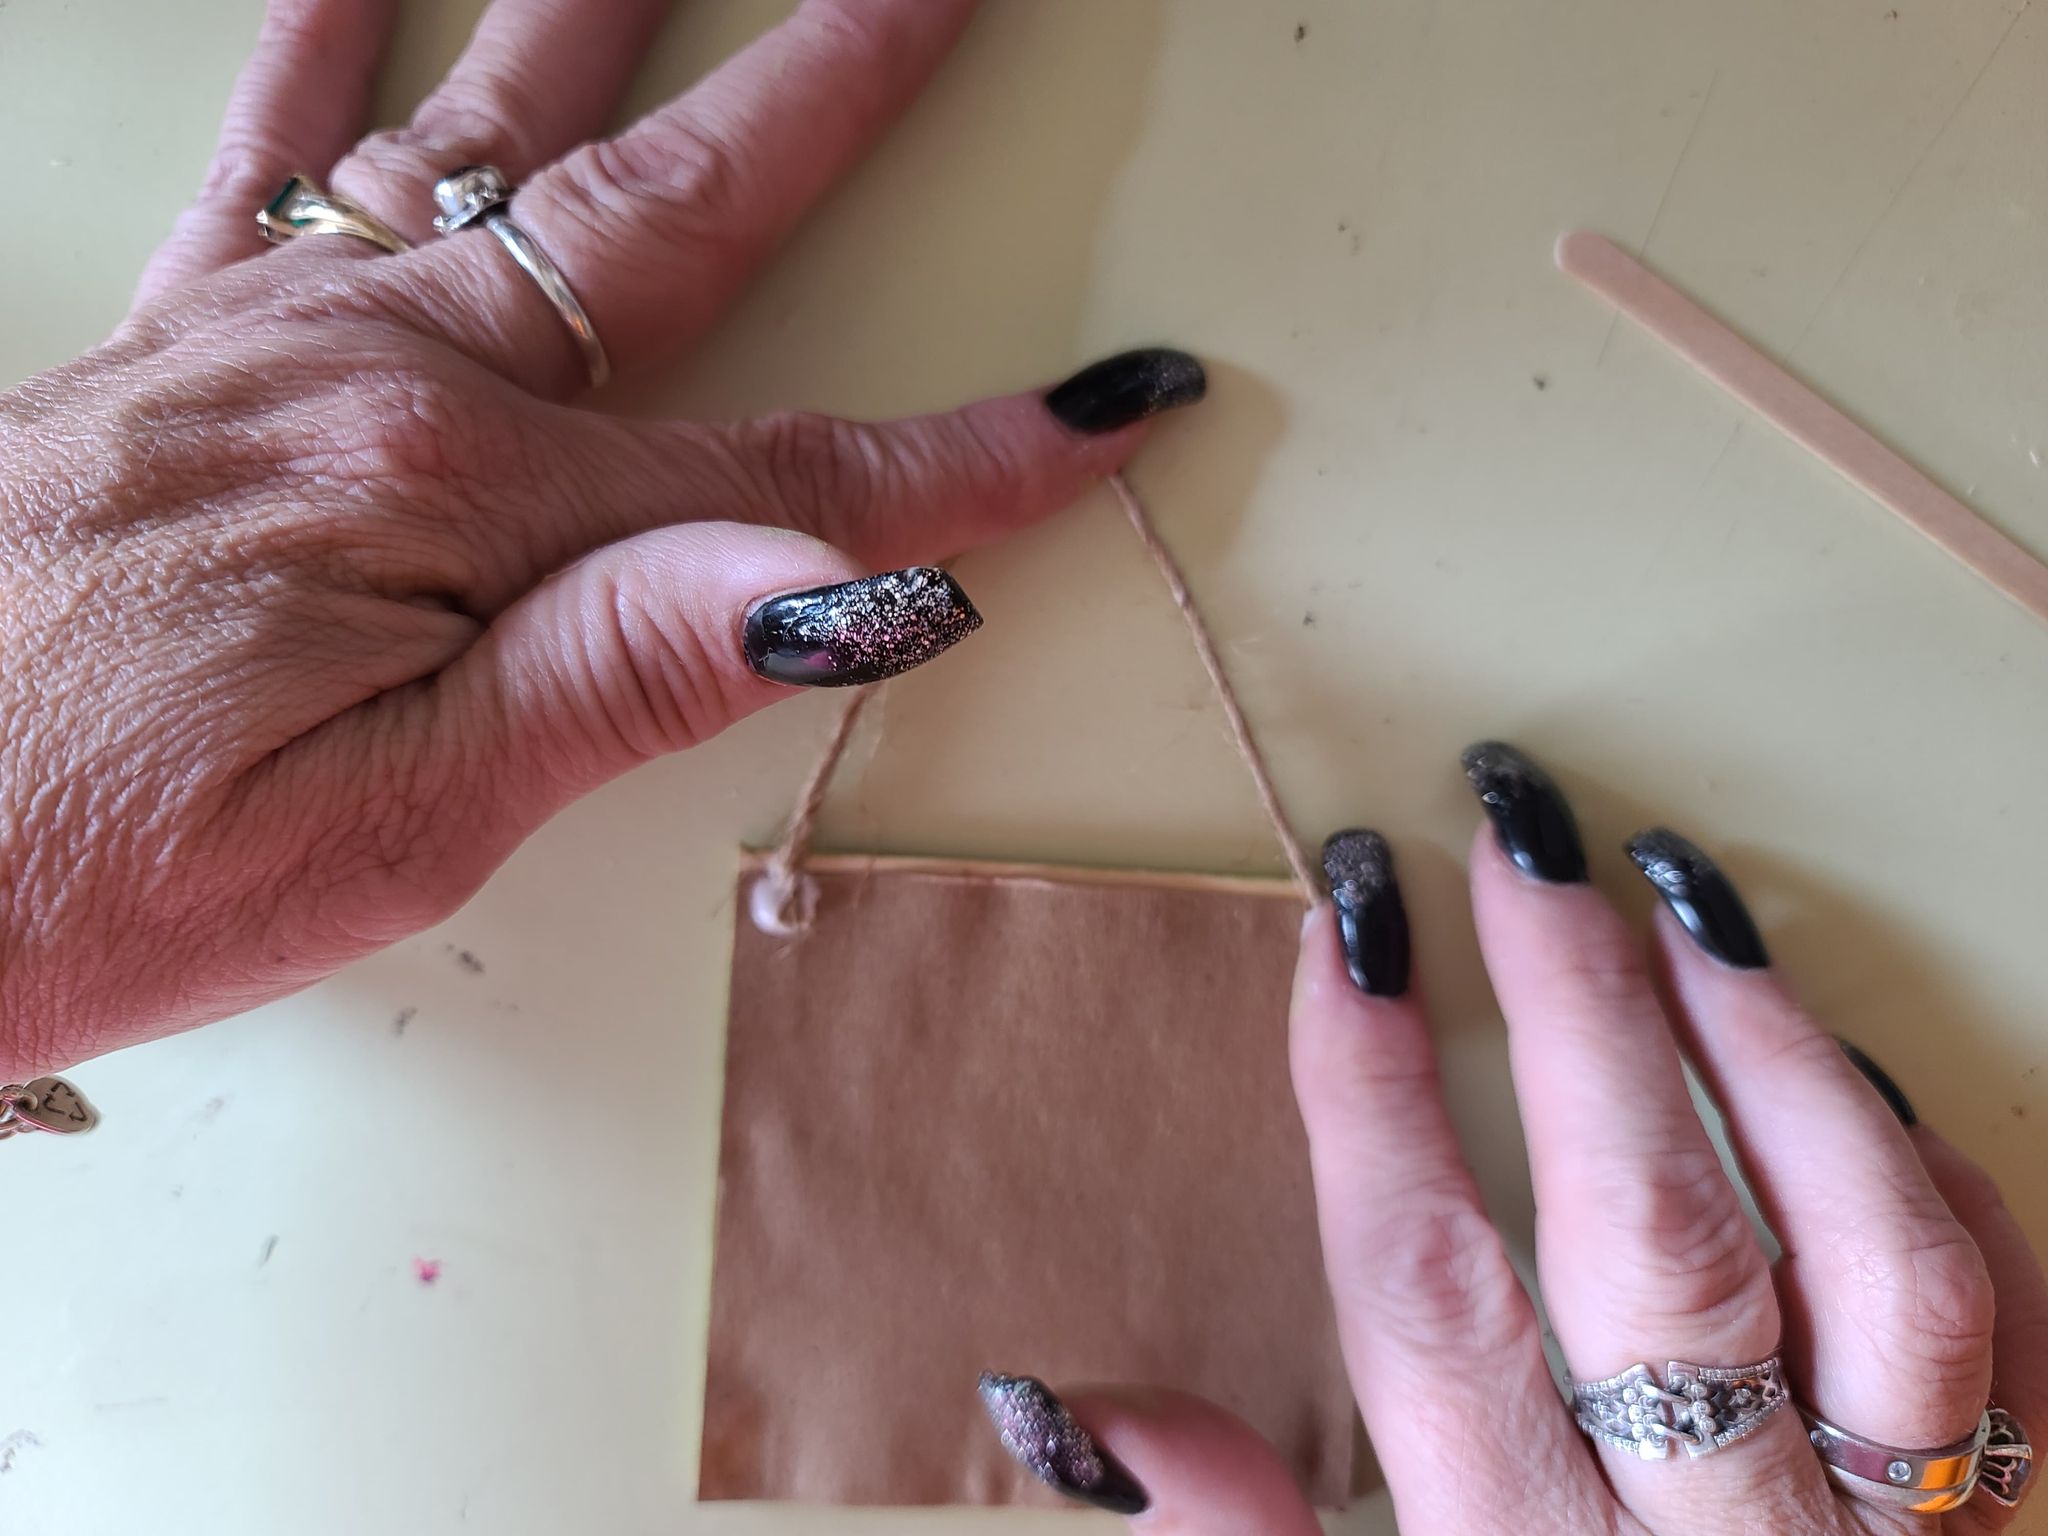
I had this wonderful kraft paper envelope with a wonderful quote on it that would make such a cute wall hanging in one of the rooms. So I got busy, it measures 3" x 3" and made out of craft sticks.  It looks so cute on the wall with a push pin!


Supplies Used:

Proxxon Table Saw:   https://www.proxxon.com/us/micromot/37070.php?search
Proxxon Sander:        https://www.proxxon.com/us/micromot/38520.php?search

Beacon Adhesives: Timber Grip Wood Glue
DecoArt:  Acrylic Paint
Dollar Store twine, craft sticks, and push pin

Set your table saw at 45 degree angle. Mark your craft sticks and cut each side on the table saw.  Be sure to wear safety glasses as those darn little pieces go flying every which way.


Sand your pieces all the way around with your Delta Sander.


Make sure your pieces line up before gluing them together.


Use Beacon Adhesives, Timber Grip wood glue to adhere the picture frame pieces together.


Once the adhesive dries, add the DecoArt paint.  It usually takes two coats as the craft sticks soak up paint pretty good.


I cut out the portion with the great quote from the kraft envelope.


Line it up with your picture frame and trim, then add glue and place on the back of the frame.  Add the twine to make the hanger.


Add it to your wall in your dollhouse with a push pin and you have new home decor made with your own hands!

Thank you for coming along on my dollhouse journey,

Candy Rosenberg
www.AVintageGirl.com 


Sunday, October 4, 2020

Proxxon Tools Great for Repairs and Fixes

I have a favorite spatula, but unfortunately, the handle split, making it useless. After a coupe unsuccessful attempts at gluing, I decided on a more permanent solution—Proxxon tools to the rescue.

Supplies and Equipment

Instructions

  1. After I removed the silicone spatula head, the handle fell apart in three pieces.
  2. I labeled the pieces to be sure they fit together correctly for the repair.

  3. Using the Delta sander, I sanded away the remnants of old glue leaving fresh wood.
  4. Next, I glued the piece back together in the correct order.

  5. With the pieces clamped in place, I set the handle aside to dry.

  6. I positioned the handle in the machine vice and drilled three equally distanced holes for the dowel pieces.

  7. Then, I glued the dowels in the holes, and again waited for the glue to dry.

  8. I sanded the dowels down, smooth with the handle, with the Delta sander.
  9. Ta da!! Repaired and good as new!!


Carole

Thursday, October 1, 2020

How to carve a gourd pumpkin

Halloween is almost here and it is time to start thinking pumpkins, carving pumpkins and jack-o'-lanterns ðŸŽƒðŸŽƒðŸŽƒðŸŽƒ   I love pumpkins, and I enjoy carving them, but it's a little sad when the pumpkin begins to shrivel up after just a few weeks.   This year I am going to bring out a few of my smaller gourds and show you how easy it is to carve them using Proxxon tools.   And these "pumpkins" will last forever.  


Equipment and supplies

Small pumpkin shaped gourds

Proxxon mini jigsaw

Proxxon rotary tool with small drill bit or a sharp awl.

Plaid paints

sealer of your choice

2 small hinges + one small latch

super glue and small screwdriver

velcro dots

1 battery powered candle light.


Let's get started.   First we need to choose a gourd   Warning gourds start out dirty!  But they are easy to clean using steel wool and water.


Now we are going to cut him open.   It is always a surprise to find out what is inside.

We need a small hole in order to insert our jigsaw blade.   If you have a Proxxon rotary tool this is perfect for drilling the small hole.   If you don't you may punch a hole using a sharp awl.


Using the Proxxon mini jigsaw I cut out the bottom of the gourd.  Notte that I made a zig-zag in my cut.   This is to make it easy to put back together properly.   Also it is important to make a straight edge where we are going to attach the hinges later.    OK let's open her up.  


Lucky me, it is dry and easy to remove.   Now my pumpkin is hollow.

Now to design a jack-o'-lantern.   I drew a simple face.   You can be more creative!


I cut it out using the Proxxon mini jigsaw.  It was a breeze!

Optional step:
Using the proxxon rotary tool with the bull nose rasp cutter I added some hair and a label on the back.


Ok back to our original plan.   We are going to add hinges to the bottom of our gourd and a latch to keep it shut.    I used glue to first affix the hinges then added very small screws.   I did the latch in the same way.


For candlelight I put velcro on the inside of the bottom of the gourd and the other side to the bottom of my battery powered candle.  That way I can open the bottom of the gourd, stick the candle on the velcro and shut the gourd.   I used some watered down plaid paints to give my pumpkin his orangey color.    And we are done.  


😀😀😀My candle changes color.  😀😀😀


Thanks for visiting.   I hope you have a happy and safe halloween.    
Thank you Proxxon and Plaid.

Check out these fine products.   Just click on the links above.   
Have fun!   catch you next time  Carol