Sunday, September 6, 2020

How to Make a Cocktail Pick on the Woodturning Lathe

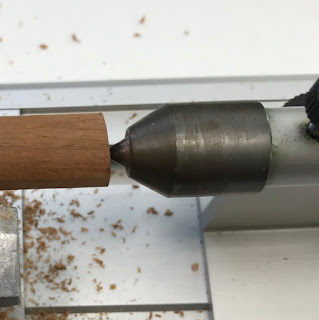
This is a great project to hone turning skills to carefully create the pointed tip of the cocktail pick. It takes sharp, sharp tools and patience to create the point without snapping the wood.

Supplies and Equipment

Instructions

  1. Use a center finder to mark the center of one end of the dowel. Use an awl to make a small divot at the center mark.
  2. Load the unmarked end of the dowel into the lathe chuck.
  3. Set tailstock so it is firmly seated in the center divot.
  4. Use a bowl gouge to begin shaping the pick. Shape the decorative handle before completing the shaping of the pick end. 
  5.  Continue shaping.
  6. Continue shaping until the dowel at the pick end just falls away.
  7. The pick is nearly finished with the handle end still attached to the dowel in the chuck. Now, sand the pick with progressively finer grits of sandpaper.
  8. The last step is parting off the completed cocktail pick at the handle. Alternatively, the entire piece—still attached to the dowel—can be removed from the lathe and cut away with a saw.
  9. Finish with a butcher block wood oil.
Carole

Friday, September 4, 2020

How to make a discrete password book using old gift or credit cards

Hi and welcome back.


 Ready for a quick and easy project, that solves an annoying problem, and recycles some useless stuff you already have in your home?
 We are going to make a a little book to hold your passwords that will fit in your purse because it is the size of a credit card.  In fact it's made from old gift or credit cards.


Look what I found when I cleaned out my drawers today.


Tools and supplies needed:
2 old credit or gift cards
1 rather stiff approx 1/2" diameter spring
2 pliers
paper cut to size
small drill bit
masking tape
rubber bands


Choose 2 credit/gift cards   Note the small spring sitting there


The spring needs to be stretched to the size of the credit card.  hold the ends and pull gently to lengthen it to aprox 2".  Set this aside for now.


 Cut paper to the size of the gift cards.   I used about 3 sheets of regular paper cut into 36 small sheets for my little book.


 Place the sheets between the 2 cards and secure them tightly with 2 rubber bands.


 I placed a piece of masking tape on one end of the cards so that I could mark where I am going to drill my holes.   Holes needed to be 1/4" apart and approx 1/4" from the edge of the card.


 Using the Proxxon mini drill press equipped with a small drill bit drill through all the layers of the "sandwich" we just made.   Leave everything rubber banded together.


Now take the stretched spring and start it in the first hole. 


Twist the spring while guiding it through the subsequent holes


 Look! we made a little spiral notebook.   ๐Ÿ˜€๐Ÿ˜€๐Ÿ˜€


 And look how it fits in my wallet.   Now it will be with me when I need it.

Wasn't that quick.   I LOVE making something out of basically nothing.   Thank you Proxxon tools the drill press made making this super easy!!   You really should check out their tools.  Made especially for the crafter in all of us.  

Thanks for visiting.   Hope to catch you next time.  I got something pretty to show you.    Meanwhile stay safe!!   Carol

Monday, August 24, 2020

How to Make Decorative Flip Flops

Hi everyone, Steph Ackerman here today showing you how to create a set of decorative flip flops to  remind you that summer is still ongoing even if we are summering in place this year.


I drew the shapes on a sheet of plywood, then used the Scroll Saw to cut them out.  I found it easiest to cut the plywood panel first so I could work with a smaller panel.


The Scroll Saw makes easy work of cutting the flip fops.


Next, I sanded the edges with the Delta Sander.  This is my go to sander.  With it's shaped sanding surface, I can get into the smallest of areas.


The Bench Drill Press easily cut the holes in each flip flop.


I used Plaid's Folk Art Paint to paint the flip flops.  Once dry, I used a stencil with Plaid Folk Art Paint to create the design on the flip flops.


To finish, I inserted ribbons in the holes and added a flower.  Now, I just need to hang these on my wall to remember that summer comes every year.


Thanks for stopping by.


Steph


Sunday, August 23, 2020

Scroll Saw Blade Hack

There are times when doing intricate scroll saw work, you need a very small pilot hole for the scroll saw blade. This can be problematic with pin-end blades. But, here's a quick and easy work-around.


How to Hack a Pin-end Scroll Saw Blade

  1. Using the Proxxon MICRO Press MP 120, select and mount the 5/16" (8mm) punch.
  2. Center the punch over the smallest hole in the base.
  3. Position the blade pin over the hole.
  4. Lower the punch, and punch out the blade pin.
  5. Use a common safety pin to replace the removed pin.
Now you need a much smaller pilot hole to accommodate the hacked blade. 


Carole

Thursday, August 20, 2020

How To Make A Wood Carving Using Proxxon Tools And Plaid Paint


Hi friends. Today I'm gonna show you how todo some simple woodcarving using Proxxon tools. I made this Moby Dick. This is part one of two blogs I'm doing for this project. You'll see how I made what you see in this picture today and next month you'll see how I added to it. Follow along with me and I'll show you how I did it.

Sunday, August 16, 2020

How to Make a Knife Sheath

A quality knife deserves special care and handling. One way to extend the life of a fine blade is to protect it when not in use with a knife sheath. Follow these instructions to create your own for any knife in your collection.

Supplies and Equipment

Instructions for Making a Knife Sheath


NOTE: The lengths of wood necessary depend on the size of the knife blade the sheath is for.
  1. Trace the blade of the knife to make a pattern or trace directly onto the balsa wood. Balsa is a good wood for the inner frame as it is soft and will not damage the blade.
  2. Add a ¼" margin/allowance to the outer edge. 
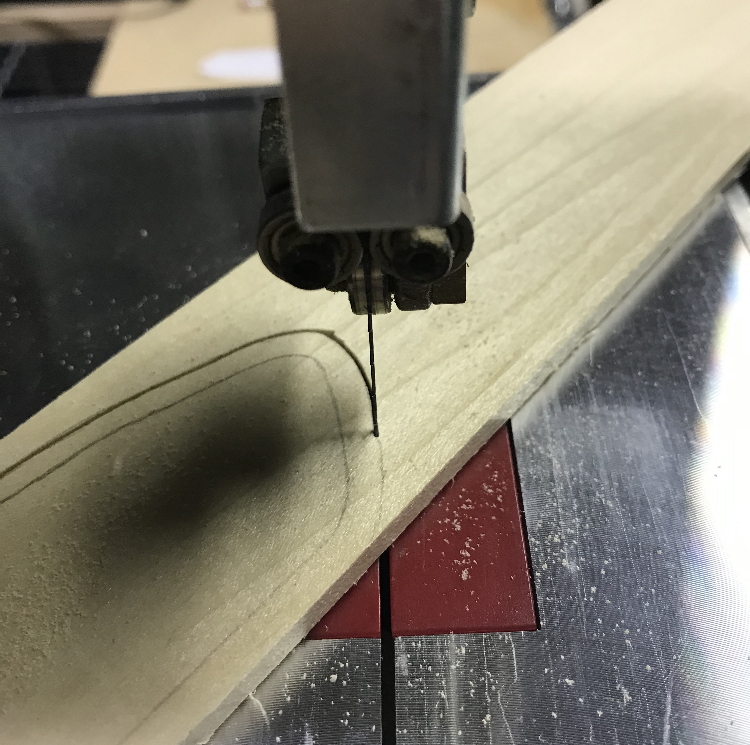
  3. Use the bandsaw or scroll saw to cut both the outer and inner edges of the balsa wood frame.
  4. Make two tracings of the outer dimension of the frame onto the hardwood. Cut the hardwood pieces on either the bandsaw or scroll saw.
  5. Using liquid wood adhesive, glue the inner frame to one of the outer shell pieces.
  6. Test fit the blade.
  7. Glue the second outer shell to the inner frame, making a sandwich—hardwood, balsa, hardwood. Don't be too concerned with flush edges. Any irregularities will be corrected in Step 9.
  8. Clamp the layers together, and set aside until the glue dries.
  9. Sand the edges flush and finish shaping the sheath on the disc sander.
  10. In the lower corner of the sheath, drill a 1/8" hole for the dowel rod. This is a removable peg that keep the knife in place when stored, and is removed to release the knife for use.
  11. Knock down the edges and finish surface sanding with the Delta sander. 
  12. Treat the finished knife sheath with wood oil.


Carole