Thursday, July 18, 2019

HOW TO BUILD A PRIMITIVE STOVE BOARD

  Stove boards or sometimes known as noodle boards sit on the top of your stove covering your burners. They can be functional as a tray or just give you a little extra counter space when not using the stove. Follow along with me and I'll show you how I made one,


Supplies:
  Proxxon Micro Band Saw
  Proxxon Table Saw
  Proxxon Delta Sander
  1/2' sanded birch plywood
  3/4" pine boards, 4" wide
  Blk Paint Pen
  Wood Glue
  1" Brads and Brad Nailer
  Wood Stain
  Polyurethane


Measure the top of the stove. subtract 1 1/2" from the length and 3/4" from the width. Transfer these dimensions to your plywood.


Cut out with my Proxxon Micro Band Saw and sand any rough edges with the Proxxon Delta Sander,


It can be left plain but I chose to make it look old by painting on some vintage style topography with the blk paint pen,


Next cut the back and sides from the 3/4" pine boards using the Proxxon Table Saw.. Cut the back first.then the two sides. I drew a slope on each of the side pieces and cut out with the band saw,

Glue and nail back on then the two sides. Sand everything.


Stain with the color of your choice.

Finish with 2 coats of satin polyurethane.

I hope you enjoyed my project as much as I did making it.   Colleen

Wednesday, July 17, 2019

Life is better in Flip Flops

Hi everyone, Steph Ackerman here today with a Summer Project.  We all know that Summer is better in flip flops so I decided to create a  project featuring flip flops, the best Summer accessory.  With so many Proxxon tools available to use, this project came together quickly.


I drew the flip flops on a wood panel, being sure they were joined in one spot.


Using the Scroll Saw, I cut around the pattern.


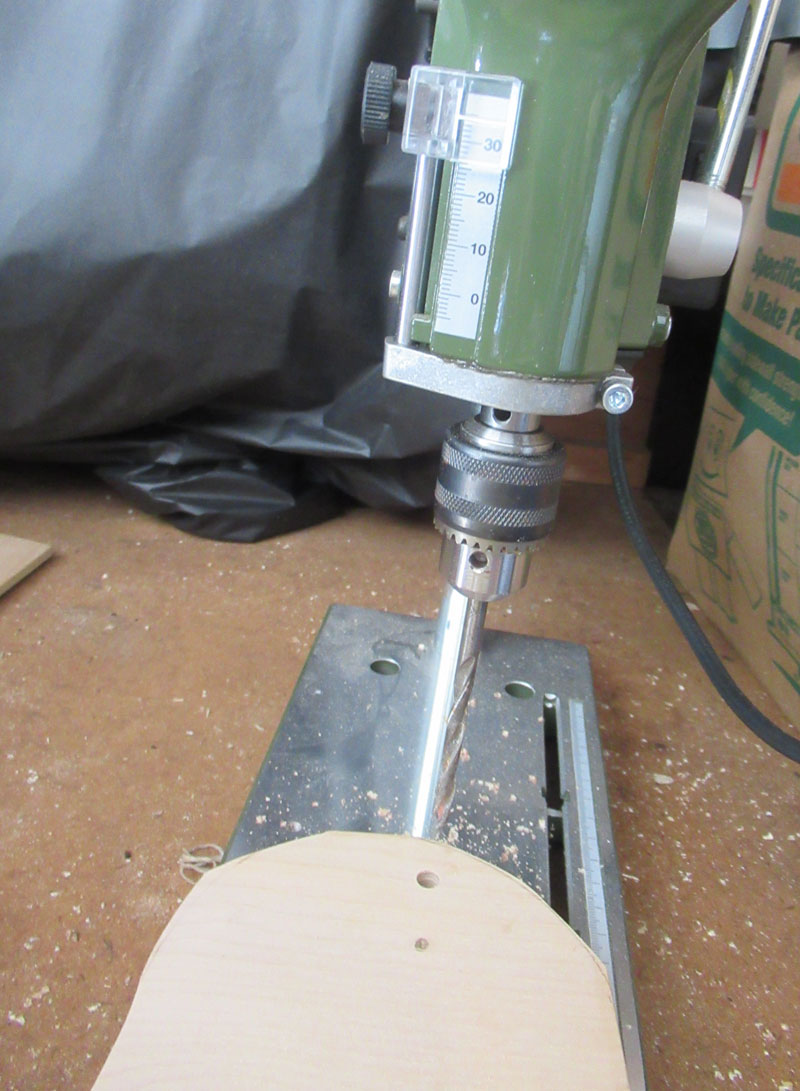
I used the Bench Drill Press to create the holes for the twine.


The Disc Sander was used to sand the rough edges.


Then I used the Delta Sander to sand down the edges that the Disc Sander couldn't reach.  This is a great sander.  The design allows you to get into the smallest of spaces.


Now the design was ready, I painted it with Plaid Folk Art paint in Pale Yellow.


Once dry, I used a stencil with Fireworks! Shimmery Craft Spray in Tangelo.


I wanted some more texture and dimension so I placed a floral stencil from The Crafter's Workshop on the flip flops and used modeling paste.


Once the modeling paste had dried, I replaced the stencil and spritzed it with Fireworks Shimmery Craft Spray in Lilac Posies - love this color!


Nothing screams beach like sand and sea shells so I created sea shells from Makin's White Clay and a push mold, then added them to the flip flops surrounded by mini art stones and string.   I used Mod Podge Spray on Adhesive to adhere these elements and added a sprtiz over them to seal them.   Finally, I used a small Adventure stencil from The Crafter's Workshop with modeling paste above the shells and some dew drops from The Robin's Nest about the flowers.

Thanks for stopping by.


Sunday, July 14, 2019

How to Make an American Girl Bean Bag Toss Game

My granddaughter suggested this project after she saw my floating wine bottle pillar. She said all I needed to do was add more holes for a bean bag toss game for her dolls.

Supplies and Equipment for the Bean Bag Toss Game

  1. Use the table saw to cut the plywood to size using the auxiliary stop as necessary.
  2. Use the bandsaw to cut two 2½" long pieces of ¼" dowel.
  3. Use a quarter to mark the rounded corners of the game board.
  4. Round the corners using the disc sander.
  5. Use the template to mark the centers of the large holes and the position of the ¼" holes for the dowels.
  6. Use the drill press to drill the ¼" holes and the centers of the large holes.
  7. Use the scroll saw or a hole saw to cut the large holes. If using the scroll saw, mount the pattern onto the board, thread the blade through a center hole, and cut out the circle following the pattern.
  8. Mount the rotary tool in the drill stand, and rotate it 90°. 
  9. Use a sanding drum to sand the insides of the large game board holes.
  10. Sand the surfaces with the Delta sander using progressively finer grits of sandpaper.
  11. Glue the dowels in the ¼" holes at the top of the game board.
  12. When the glue has thoroughly dried, paint and finish the game board.
  13. Optionally, add numbers for scoring.
Note: I made tiny 1¼" square bean bags from fabric scraps and filled them with rice. Alternatively, you could use a small bouncing ball or jack ball.
Carole

Saturday, July 13, 2019

Making a Gourd Bowl with Proxxon Tools


Supplies Needed for this Project:

Wooden Balls for feet
Bottom piece of round gourd
Alcohol Ink (Meadow)
Small piece of felt
#3 Round Reed in Blues and Green
Fancy Yarn In Blues
Large hole beads in blue and green
Pencil
Ruler
Napkin
Paint Brush
X-Acto Knife
Glue (Weldbond)


This is the majority of the items used in this project. I also used a napkin and Plaid Mod Podge to finish the inside of the gourd. Begin with cleaning the piece of bottom from a gourd that you want to use.  Then glue large wooden balls onto the bottom for feet. Using the Alcohol Ink and a piece of felt, apply the Alcohol Ink to the outside of the piece of gourd.


Spread the Plaid Mod Podge onto the gourd with a brush. Center your napkin and press out any air bubbles that you might have. Once the napkin has dried enough, trim around the edge with an X-Acto knife. Spread a layer of Plaid Mod Podge on top of the napkin and let dry.


Using your pencil mark spots for the holes that the spokes go into evenly around the gourd. If you are going to use a triple twine as was done here then you need to have an uneven amount of squares as in a number divided by 3-1 such as 29, 32 etc.


After the holes are marked use the Proxxon Rotary Tool and drill bit to make your holes approximately 1/4" deep. Drill the holes at an angle.


This is what the holes should look like. Insert a corresponding amount of spokes tipped with glue (I used Weldbond) , 14" long into the holes. I used a triple twine with a light blue, dark blue and dk. green reed. I did three rows. Make sure that you keep your reed moist and pliable by spraying them regularly with water. Then use the fancy ribbon to weave around your gourd twice. ( I doubled the ribbon when weaving). Use one light blue reed, and one dk. blue reed and do a double twine around the gourd bottom twice. Add your beads onto the spokes, first green then blue. Then use three light blue reed and do another triple twine around the gourd. Those are the final rows and the spokes are now woven into the top in a simple design.


The woven gourd bottom should look like this when finished. After you have finished weaving and your reed has dried, trim off the long ends left inside the bowl.

I hope you liked this piece and that it inspires you to give weaving on gourds a try. There are several places that you can go to purchase books on the subject. Proxxon Tools certainly do help in creating many things. Check out their online store at: http://www.proxxon.com and see if there isn't a tool that you might want. Check out the Mod Podge at: http://www.plaidonline.com

Leave me a comment while you're here. I enjoy reading them.
Barbara

Friday, July 5, 2019

How to make a simple ruler box

Hi everyone!
Here it is early July and guess what?   I went to the store today and they were selling "back to school supplies" already!   Well, seems a little early but I am one for a bargain, so when I saw they were selling rulers for 25 cents I figured I could probably use them for something, so I got me "some".  By "some" I mean 12, but I only used 10 for this project. 😜     Today I am going to show you how to make a little hold it all box for whatever you got that you need to keep together.

 Let's start with what you need.

Supplies and equipment:

10 cheap little rulers (or 3-4 yardsticks)
A thin piece of board  ( I used hardboard) , measuring 12" x 6"
wood glue, 
small wood clamps


The first thing I did was to cut my hardboard to size.   I used the Proxxon mini table saw to do this.  I love the smaller size saw when working with smaller material.↓  Note I am using the fence for this rip cut.  This keeps my cuts square.


I am going to leave the long sides of my box at 12" So they are all ready to go. 
 I cut my short sides to 6"   No measuring needed, just cut at the 6" mark on the ruler 👀 I use the miter gauge here for my cross cut.


At this point I decided one ruler height was not enough so I glued 2 together to make them taller.  I did that for all my pieces.   I used some wood glue and clamps, and added a little weight to keep it flat and let them dry well.


Once everything was dry I used glue and clamps to build the box.  I glued the sides to each other and to the hardboard piece I am using as my bottom.   It may be a little shaky at this point but we are going to add some dividers and this will strengthen the whole thing.  I used clamps to hold everything securely while the glue dries.


The dividers are more rulers cut to 6" lengths, and glued together for height .  Then these are glued into the box.   You can space them anyway you like, or as you need, for whatever it is you are going to put in there.  Add some cross pieces if you need more little cubbies.


Now that the box is done and it is quite sturdy, fill it with whatever you like.   

Cost to build less than $3.00  Time to build about 1 hr, minus drying time.  Usefulness?  you decide.   But as always, I had fun building it and sharing it with you.  Thanks for visiting.!!!   Carol


Wednesday, July 3, 2019

Hot to Etch Party Themed Glassware

Hi everyone, Steph Ackerman here to show you how to etch Party Themed Glassware for a festive holiday decorative element. 

Using the Proxxon Engraver GG 12, it takes only a few minutes to etch designs into glassware.  You can even engrave into plastic, metal and wood.


I began by die cutting some firework shapes and temporarily tacking them inside the jars.  This was done so I had a template to follow.


Then I simply etched around the die cuts using a diamond bit.  Weighing only 4 ounces, it was quite easy to do all the etching I wanted in one sitting.

 
To achieve a frosted appearance, I used pliers to remove the diamond bit and inserted the ball shape bit.  With this bit, I was able to add definition around the image and fill in some other areas.


Placing napkins inside really showcases the etched designs. 


Now fill with whatever you need for the party.  I'm using them to hold the party plastic ware.  What would you use them for?


Thanks for stopping by.